Types of lining
Initially, this material was used to decorate the walls of carriages (hence the name). However, for quite a long time, lining has been used to decorate walls inside houses.
Its advantages are widely known - environmental friendliness, aesthetics, accessibility, ease of installation.
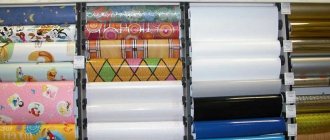
Manufacturers offer the following types of lining:
- At quarter. This type does not have a tongue-and-groove fastening system, but has protrusions in the side parts. It allows you to lay the boards overlapping, which creates a rather interesting effect.
- With tongue and groove. This type of lining is usually used for finishing vertical surfaces. It resembles an ordinary tongue and groove board, but smaller in size. Office premises, reception areas are the scope of application of this type of lining.
- “Calm”, “Peasant”, “Russian”, “Simple” are the most popular types of lining. Equipped with a tongue-and-groove locking system, a compensation groove and a flat, perfectly smooth surface.
- The double-sided type has a classic connection system presented on both sides.
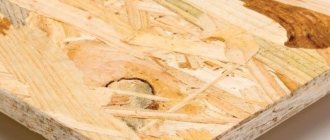
- Eurolining. Reminds me of an edged board. A characteristic feature of this type is high-quality processing on each side. The elements are connected to each other using the “groove-tenon” principle. Eurolining is most often made from coniferous trees. The enlarged connection point of this type (up to 8 millimeters) allows you to create a coating without visible seams.
In addition, on the back side of the profile there is a special recess that serves as an air outlet. Thanks to this, condensation, mold and fungi do not appear on the panels.
- "American". It has the shape of an irregular rectangle. There is a groove along the widest part of it, which makes it possible to create an interesting decorative effect - the boards seem to be laid overlapping.
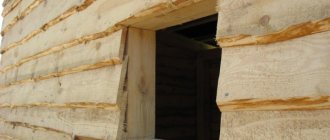
- Block house. This type creates a coating that imitates a structure made from rounded logs. During installation, lathing is used. Creates a heat and sound insulating surface that is not susceptible to splitting or cracking.
- "Finka." This type has an oval or rounded shape.
Each of these types of lining is good in its own way, each is popular. But even the most beautiful coating can get boring and make you want to, if not change it, then at least update it. For this, various coloring compounds, varnishes, impregnations, and so on are used.
Wooden lining is often coated with such substances to extend its service life, emphasize or, on the contrary, hide the structure of natural wood.
How to paint lining inside a country house: options
Published by: Arthur Kanapatsky 0
Lining covering is a finishing that is widely used both indoors and outdoors. This coating is simple, but quite reliable. It is used to decorate walls, ceilings, doors, verandas, etc. Lining is wood, and wood is the most environmentally friendly building material. However, wood, like any other material used inside and outside a home, loses its appeal over time. It becomes covered with layers of dust, absorbs it, and becomes dull. This material is highly susceptible to changes in temperature and humidity. Therefore, it needs protection and restoration.
Advantages and disadvantages of painting lining
Painting the lining with enamel or colorless varnish can extend the life of the material. If the board is used for covering walls and work surfaces in a utility room, you can get by with regular impregnation.
In a house or apartment, it is better to paint wood paneling with high-quality paint for practical and decorative purposes.
After all, replacing a damaged top layer of wood is much more expensive than several cans of enamel. You can purchase a ready-made painted board or paint it yourself. Coating panels with your own hands has many advantages:
- Possibility of coloring elements in different colors, applying your own design, texture;
- Saving money. Treated lining is much more expensive;
- Possibility to choose the most incredible shade;
- Increasing resistance to negative external factors;
- Quick drying.
It is necessary to paint the lining before installation. During the normal drying process, there will be no light streaks at the joints that spoil the entire look.
There are practically no disadvantages to painting lining. The main negative point is the loss of the natural pattern and appearance of the wood.
Some negative consequences can be avoided if you take into account the purpose of the room when choosing a paint and varnish material. Oil impregnation and drying oil are not suitable for baths and saunas. It is better to use solid mixtures with the addition of wax. It is not recommended to use flammable, toxic enamels for painting wooden boards in closed, unventilated areas. Painting lining floors should be carried out taking into account the abrasion of the material.
To avoid having to repaint frequently, you should choose mixtures with high wear resistance.
Step-by-step instruction
You can paint the inside of a house made of timber or clapboard in a matter of hours. Arm yourself with a brush or roller and get to work:
- even when using environmentally friendly products, it is necessary to ensure sufficient ventilation in the room;
- to obtain an even color, work must be carried out at a temperature of 18-25°C; in hot weather, the paint will dry unevenly; with high humidity, stains may form on the surface;
- To prevent visible boundaries from forming on the surface, it is necessary to paint the wall in one go, without throwing the brush halfway;
- a roller will allow you to distribute the composition more evenly, without streaks, plus less paint is consumed; It is better to use the brush only in hard-to-reach corners;
- It’s difficult to paint new boards the first time; several (2 or more) layers may be needed; It is unacceptable to apply new paint to wet paint - streaks will form; Each previous layer should be dried well.
Useful lifehacks
In conclusion, some advice from experienced painters:
- for painting large areas, it is more profitable to purchase paint in large containers;
- after drying, it always changes shade; depending on the composition, the surface may darken or, on the contrary, lighten; in order not to make a mistake in your choice, you should experiment on a small piece of wood;
- To avoid drips, it is better to apply the paint in vertical strokes;
- acrylic varnishes dry quickly, but gain strength in about 7 days, during which time the walls should be protected from mechanical damage;
- applying scuba caps is more difficult; Special brushes are used to smooth out compounds and remove bubbles.
So, painting timber, logs or clapboards inside the house is not difficult. The main thing is to choose the right composition and strictly follow the manufacturer’s recommendations.
Solutions used for coloring
There are many means for covering lining. These are compositions for internal and external cladding of premises. They differ in composition, speed and quality characteristics.
For example, a wooden exterior façade is affected by ultraviolet rays, moisture, high and low temperatures, so the finishing coating should contain the predominant majority of protective components.
You can decorate the lining of the interior of the house with ordinary enamels and paints. Painted natural boards have an original appearance. Each mixture after painting gives a certain effect to standard lining.
The choice of solution depends on the preferences of the owner of a country or city building.
General recommendations
How to paint a wooden house from the inside? Every homeowner has asked this question at least once in their life. Painting a log house is not an easy task. Many owners, doing this themselves, skip the preparatory stage and immediately proceed to painting.
Because of this error, various troubles with painted surfaces are possible, for example, wood rotting and the appearance of parasites in it. You need to paint the wood according to the above description. Therefore, painting timber and timber houses will take a lot of time and effort.
Paint for the interior decoration of a wooden house must be environmentally friendly, dry quickly and have no odor. The decorative finishing of a room, as well as its design, directly depends on the correct choice of this material. When choosing paint, carefully study the labels and consult with store clerks.
Painting tips (1 video)
Protective agents: properties and application technology
Proper and timely use of protective equipment allows natural lining not to lose its appearance and original structure for many years. Antiseptic agents can increase the moisture resistance and durability of the material.
The solutions also prevent damage by insects, various microorganisms, and the formation of mold, which is detrimental not only to the lining, but also to the health of the dacha owners.
Based on the basis of manufacture, antiseptic agents are divided into four main groups:
- Organic solvents. They penetrate deep into the material, destroy areas of rot and mold, and prevent the appearance of new ones. Actively combat biological pollution. They have a pungent odor. Can be used indoors and outdoors;
- Water-soluble products. Temporarily protect wood in contact with moisture. Used for preventive purposes;
- Oil antiseptics. It is recommended to treat lining that is in the open air in contact with the ground with moisture. Effectively protect material in difficult conditions;
- Combined mixtures. The solutions contain various substances. Inherent in each group. They cope well with mold, moisture, and high temperatures. Can be used for both internal and external processing.
To reduce the negative impact on the lining, various solutions are used. Bioprotective compounds successfully fight pests, mold, and mildew. Fire retardants provide fire protection and slow down the spread of fire.
Complex protective agents – biopyrenes – are used as a base coating.
To bleach wood, you can use chlorine-containing mixtures, hydrogen peroxide, and special industrial liquids. Lining made from low grades of wood must be treated with primer to fill the pores.
The lining is covered with protective agents before varnishing and decorative treatment.
The application technology consists of impregnating each fragment separately and on both sides. Using a brush or roller, spread the antiseptic over the entire surface in a thin layer. It is necessary to reach all hidden areas (corners, recesses). Wooden boards should dry without touching each other.
Types of compositions for lining
All wood treatment products are conventionally divided into protective and decorative. Some of them need to be combined, others can be used independently. Ideally, primary processing should be carried out before installing wooden lining, so the products will be protected from adverse factors from all sides. If the siding is already installed and has a coating, it will need to be removed or sanded.
Note! Eurolining, if it is manufactured according to the standard, is already covered with protective or protective-decorative compounds.
Protective means
The primary objectives of these compounds are to protect the wood from pests, mold, mildew, moisture, temperature changes and extend the service life of the lining and finishing coating.
Common products for treating wooden surfaces:
- Primer. A popular base for decorative finishing. It improves adhesion, prevents moisture absorption and resin release, fills pores and hides minor irregularities. Compositions with an antiseptic additive are produced; they protect the tree from damage by mold and mildew.
- Oil-wax. Creates a surface of a dense film that perfectly repels water. This treatment is necessary for rooms with high humidity.
- Linseed oil. Penetrates wood deeply and hardens over time. Protects from moisture and gives the lining a distinct structure.
- Drying oil. Once a popular processing tool. Today it is being replaced by more advanced compounds. Improves the hydrophobicity of wood, but the coating quickly changes color and sticks.
- Bleach. The material is more often used topically, where there are defects such as blue spots or natural darkening.
- Antiseptics. Protect the surface from pests, fungus and mold. They are also used on affected areas of the finish.
- Fire retardants. Reduces the ability of wood to ignite and spread fire.
Oil-wax and linseed oil do not require additional processing, as they give the surface a pronounced pattern, and the color can be tinted. It is also permissible not to paint drying oil, but it will have to be renewed frequently. Primer and antiseptics are used as a base for finishing.
Decorative coatings
These compositions must be selected taking into account the condition of the finish. There are products that preserve and emphasize the natural appearance of wood, make annual rings more pronounced, and add color. Others, on the contrary, hide the design under a thick layer of color. The first ones should be used if the lining has no defects (grades Extra, A and AB) and old paint. Second, for products with numerous damages (grades B and C) and coatings that cannot be removed.
Transparent compositions for finishing wooden lining: varnishes, stains, some paints. Opaque: acrylic and oil paint, water-based.
Acrylic, alkyd and water-based varnishes are most suitable for interior work. Completely preserve the natural appearance of wood. You can add pigment to the composition, which will give the lining a tint. The varnished surface has a glossy or matte texture. Additionally, they protect the finish from moisture, discoloration and minor mechanical damage. May contain antiseptic additives.
Decorative azure
Gives wood a distinct structure and any color. It does not form a film on the surface, but penetrates deeply. The material is transparent, so the lining underneath should be without significant defects. In addition to decorative, it performs a protective function.
stain
It has almost the same effect as decorative azure. Paints wood a rich brown color in different shades. Stain is often used to artificially age lining. It is important to consider that it does not protect enough from moisture.
Acrylic water-based translucent paint
Forms a thin layer on the surface of the wood, through which the texture and natural shade of the wood are visible. Such paints hide minor finishing defects.
Oil paint
Thick opaque coating. Forms a film on the surface. Can have any shade. Maintains color and integrity for a long time. This lining paint requires updating approximately every 5 years. Has a pungent odor.
Acrylic paint
A more durable opaque finish than oil paint. It has virtually no odor and dries in a short time. Can create matte and glossy finish. Its only drawback is its high cost.
Water-based
The paints are odorless and dry quickly. They form a matte or semi-matte texture. Suitable for dry rooms only.
The video shows an example of a competent combination of protective and decorative coatings for lining, applied at home, without the use of special tools.
Varnish compositions and their properties
To refresh the antiseptic-impregnated lining and refine the finish, the wood is varnished. The required composition of the solution is selected based on the type and purpose of the room.
- Oil- based resin varnishes can have different shades - from transparent to dark chocolate.
The coating hardens quickly, forming a dense film. The moisture-resistant surface is easy to clean and is completely ready for further painting. The main disadvantage is the high level of fire hazard.
- Alkyd universal solutions have a high level of resistance to external negative factors. They are absorbed deep into the wood, so they take a long time to dry (up to 3 days). Alkyd-urea varnishes have almost identical characteristics. Before use, the solution must be mixed with an acid hardener.
It has a strong shine after hardening. Disadvantage: high price, rapid ignition.
- Alcohol polishes and varnishes are used in minimal quantities to coat individual elements of the lining. Apply a very thin layer of solution using a cotton swab or small brush. The dried coating noticeably shines and gains elasticity. Some types of alcohol mixtures do not tolerate sunlight, so they cannot be used on large areas of the lining.
- The composition of nitrocellulose varnishes includes plasticizers, resins, and pigment. After application to wood, they form a dense protective and decorative coating. They do not cover lining intended for finishing facades. Nitrovarnish does not tolerate sunlight. High temperature.
- polyurethane and acrylic solutions are applied to the lining in several layers due to the high volatility of the mixture. They have surface tension properties and do not crack or wear off. The varnish adheres tightly to the wood, protects it from chemicals and getting wet.
How can you paint the lining?
Before starting cladding work, the wood must be treated to prevent the development of fungus, moisture or sun. To extend the life of antiseptic impregnations, the lining is periodically coated with fire retardants and various varnishes.
| Type | Description |
| Fire retardants | Reduces the flammability of a wooden surface. In case of fire, the tree will conduct the fire more slowly, which will help to extinguish it faster. The composition is non-toxic and practically does not change the color of the material. |
| Antiseptics | Prevents infection by fungal spores and stops its development. In dry rooms, condensation accumulates at the joints of panels, which, combining with dust, helps the development of microorganisms. After a while, treatment with bactericidal agents is repeated, since they can evaporate or be washed out. There are complex action mixtures that simultaneously kill putrefactive formations and create a moisture-repellent barrier on the surface of the tree. The disadvantage of a universal product is its high price, but the advantage is that it replaces antiseptic, stain and varnish. |
| Linseed oil | Impregnation penetrates deep into the wood texture, making it much stronger. This material is resistant to moisture and fungus, has a pronounced texture and a matte surface. |
| Bleaches | They help remove dark marks, stripes, and bluish areas from the lining. Bleach has different effectiveness and method of application. Apply to problem areas and then wash off with water. |
| Stains | They protect the material from harmful microorganisms, but the shade of the wood changes. More often, stains are used that change the color of the lining to dark. After application, a film does not form on the surface; the composition is absorbed into the pores of the wood to a certain depth, due to which its structure is clearly distinguished. After impregnation with stain, the surface must be varnished so that it does not appear dirty. |
| Drying oils | It used to be a popular impregnation, but now it is used much less frequently. After a few years, the surface treated with drying oil becomes dark and sticky. |
| Lucky | Acrylic varnishes are used for interior work; they are non-toxic and safe. They protect the surface and make it more attractive. The first layer is applied with a colorless composition, and a mixture with pigment is used for recoating. The varnish can create matte, glossy and semi-matte surfaces. |
| Waxes | Effectively protect wood, giving it a semi-matte sheen. They come in solid, liquid and watery states. Before use, hard wax is heated, the remaining forms are immediately ready for use. Disadvantage: wax is difficult to apply evenly. To facilitate the process, the surface is first primed. |
| Oil paints | Used to decorate wooden coverings. The dye penetrates deeply into the structure of the wood, preventing moisture from penetrating into it, but the composition is practically powerless in the presence of steam. It takes a long time to dry and the color of the surface fades over time. Has a pungent odor. |
| Acrylates | After painting with the base it does not fade for a long time, the color does not fade. Dries quickly and penetrates deeply into the surface of the material. Has high insulating characteristics in relation to steam. The created coating does not crack due to thermal deformation of the lining. It costs expensive. |
| Acrylic scuba tanks | They are environmentally friendly, create a moisture-resistant, durable coating that does not wear off, does not fade, and protects against microorganisms and UV radiation. The lining treated with aqualac looks impressive and expensive. Scuba tanks are odorless, so they are suitable for interior decoration and children's rooms. |
Paint selection
To paint the lining, you can use various types of coloring compounds. Of course, if the work will be carried out inside a living space, it is better to choose those compounds that do not have a strong odor.
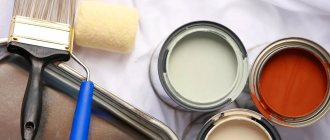
The modern market offers a wide range of different paints:
- Oily. This is a recognized leader among all decorative coatings. Thanks to deep penetration into the surface, the result is reliable protection. This type of paint provides good coverage that remains attractive for a long time. Disadvantages include the presence of a sharp, specific odor and the drying time.
This type of paint is best used outdoors, outside. It is not very suitable for interior decoration.
- Acrylic paints. They dry quickly, do not have a pungent odor, retain their original color for a long time, and are resistant to moisture. Well suited for interior work.
- Acrylic scuba tank. One of the best ways to design lining. This is an environmentally friendly material that provides a strong and durable coating.
- Alkyd varnish. It takes a long time to dry and is highly flammable. But it is insensitive to moisture and temperature changes.
- Glaze. Emphasizes the natural structure of wood. If you add color to it, you can get a colored coating.
- Opaque enamel. Optimal for suburban buildings. Due to the formation of a dense layer, it provides good protection from mechanical stress, damage, and also hides existing defects.
- Water-based. Preserves the wood texture and gives a matte finish. The paint dries quickly and has no odor;
- Silicone. Withstands impressive mechanical loads. It has good vapor permeability and masks defects. Retains color for 30 years;
- Alkyd-based enamel. Suitable for decorating lining. During prolonged drying, it emits a pungent, unpleasant odor. Fades quickly in the sun;
- Wax. Traditional, natural material for processing lining. After painting, it retains the natural pattern of wood, gives a matte, glossy shine;
- Silicate. The composition includes liquid glass, which significantly improves the characteristics of the paint. She is not afraid of ultraviolet rays. A dye with increased fire resistance protects the lining from temperature changes.
Why do you need to sheathe the walls of a wooden house? What are the requirements for the material?
The practice of building houses made of wood and finishing it in Russia over many centuries has proven their optimal performance characteristics. Modern exterior cladding is needed to achieve certain goals:
- Protecting wooden walls from the negative effects of climatic precipitation - windiness, icing, etc.
- Creating good hydro-thermal insulation of the home. And the more heat-conducting and vapor-permeable properties a material has, the better quality it will perform.
- Protecting the building from mechanical influences such as cracks, splits and other unpleasant consequences.
- Additional sound insulation indoors.
- Protecting wooden structures from rotting, dampness and fungus.
- Decorating the façade of a building in a specific architectural and artistic style. To maintain the unchanged, attractive appearance of the building, it is best to select a material with high resistance to solar radiation and ultraviolet exposure. This will significantly reduce the likelihood of upholstery color loss.
- Protecting a wooden house from fire, ensuring maximum fire resistance of the structure.
There are no special rules when selecting materials for finishing a wooden house outside. But still, you should give preference to facing material that has the following characteristics:
- will serve as high-quality and reliable insulation;
- will provide good vapor permeability;
- will be easy to install;
- with low cost;
- does not require constant painting.
How to calculate the required amount of paint
Any repair or construction must begin with an estimate and detailed instructions. Consumables, such as paint for lining, must be purchased in reserve. When making calculations, one should take into account the characteristics of the surface, tools, professionalism of the work performers, the number of layers and the texture of the mixture.
If the entire room is to be painted, then first of all it is necessary to determine its perimeter.
- We take away the area of doors, windows, openings and other untreated surfaces.
- The result obtained must be compared with the standard consumption of the selected type of paint.
- Manufacturers place this information on the product label.
- You need to understand that the quantity is indicated taking into account the work under ideal conditions, for one layer of painting.
Lining painting technology
Factory-painted lining elements cost several times more than untreated boards. The services of hired workers will also not be cheap. To save money, you can carry out all stages of coating yourself. Fortunately, this is not difficult to do.
Properly selected consumables and auxiliary materials will enliven the interior and fill the house with new colors.
The application of enamel should be carried out after antiseptic procedures, priming and varnishing. When working with any mixture, certain rules must be followed. Only in this case can you count on a positive result.
Required materials and tools
Even a beginner can paint lining well. It's better to work with new material. It is quite simple to prepare, process and dry. The task becomes more difficult if the boards have already been used and the toning needs to be updated.
Only clean lining can be repainted. The method of removing varnished coating is the same for all types of wood.
It is better to bleach pine and larch in warm and ventilated areas. Painting wooden panels is carried out using a minimal set of tools and materials.
You need to prepare:
- Paint tray;
- Galvanized, plastic bucket;
- Brushes for applying paint of different sizes, roller, spray gun;
- A ladder that allows you to reach the ceiling;
- Solutions for painting (stain, varnish, enamel, primer);
- Tools for stripping, grinding, rubbing (sandpaper, leather flaps, sanding machine and others);
- Wide safety glasses, mask, gloves.
What is better to paint
To apply paint to the lining, you can use a brush, spray gun or roller. Choosing the right tool will make the process much easier. For a small area, you can use a wide brush. In this case, the paint should be moderately thick so that there are no noticeable marks from the strokes.
This material can be used to add color to both individual boards and the assembled structure.
It is better to use a roller for covering eurolining and other types of boards with a smooth surface, with unpronounced seams. You can take a wide tool that grabs two boards at once. This will speed up the process and reduce paint consumption.
When using a household spray gun, you must prepare for high consumption of water emulsion. In order for the paint to be better absorbed into the wood, the solution should be made very liquid. With this technology, leaks and layers are inevitable.
It is necessary to strictly maintain the distance between injections to avoid the formation of drops.
Work progress and innovative proposal
The presented progress of work is based on the fact that the rough surface for the work is wood. Regardless of what kind of coating you have, the progress of work will not be fundamentally different.
Work progress
Among the actions performed:
- We monitor the condition of the rough surface and, if defects are found, we eliminate them:
- remove all loose fragments;
- prime all cracks;
- All joints (usually important for round logs) are filled with adhesive tow and primed.
- firstly, we treat with antiseptics;
- secondly, we prime; if the surface material leaves much to be desired, we recommend using a deep-penetrating strengthening primer;
- Next, prepare the surface for painting:
Painting the walls at the dacha can be done with any good paint, but the name of the boat “Polyot” will not make it take off at all
- we wait until the entire surface is completely dry, which is at least 6 hours;
- carefully sand and start painting.
- we always count on two, or even three, layers of paint, and each subsequent layer should have a decreasing consistency; we mean that:
- the next layer can be applied only after the previous one has dried - this is usually 3-5 days;
- If you use specialized waterproof paint, then keep in mind that its final declared properties will take effect no earlier than in 10-15 days.
Instructions for painting any house require keeping in mind the final design of the entire structure, and not just its walls, which was done very successfully in this example
Rubber paint
Acrylic paint is widely used as the main option for painting a country house, and rightly so. This one best meets all the stated requirements.
But we advise you to look at the latest innovative proposals that can change our preferences. One such proposal is the so-called rubber paint.
It has very high stability characteristics, is extremely elastic, and therefore will not crack even under harsh operating conditions.
And, besides:
- it can be used on almost all surfaces;
- It is not even recommended to dilute this paint;
- it has a very short drying time:
There are always increased requirements for paints in the interior, both from an environmental point of view and from the point of view of color compatibility
- so as not to stick - no more than an hour;
- full - no more than 3 hours (although this parameter greatly depends on the temperature and humidity of the environment);
- paint consumption when laying in 2 layers per square meter (g):
- 250 – sanded wood or galvanized steel;
- 300 – corrugated sheeting with a small wave;
- 350 – putty surface, wallpaper, drywall, plywood, wood;
- 400 – concrete, brick, lining;
- 450 – slate, cement.
The price of such paint is from 700 to 1200 rubles per 5 kg bag, depending on the region and supplier, but it is worth it.
The question of how to paint a barrel at the dacha is not even worth it; what is much more important is when you do it and how much ingenuity, taste and, perhaps, the ability to smile you show
Drying and moisture level of the lining
Only high-quality, dry wood can be used for cladding. Wet lining will certainly spread and crack some time after installation. You can determine the degree of humidity at home using the traditional method. The weight of a dry board is significantly different from a wet one.
A mechanical pencil will not leave a purple streak on dry paneling. The sound of dry wood will be louder.
You can resort to traditional methods if you have comparative wet material at hand. If there is nothing to compare with, you can use a mechanical method of verification. It is necessary to drill a hole in the wood to be tested. Hold the cutter in one position for 20 seconds. Visual analysis of the excavation will indicate the approximate moisture content.
The hole began to smoke - the board was overdried, nothing happened - the humidity was normal, a fringe formed - the lumber was damp. The lining must be dried under a canopy in the open air for several months.
It is necessary to thoroughly dry the lining after each treatment (impregnation, priming, varnishing, painting). If these are separate boards, they should be placed in a ventilated area or taken outside in warm weather until completely dry.
The hardening time for each solution used is individually calculated by the manufacturer. The drying time may increase if the paint is applied in several layers.
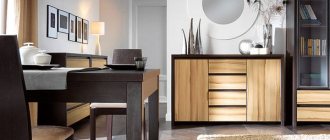
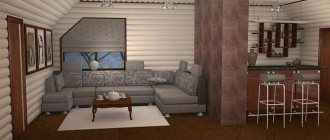
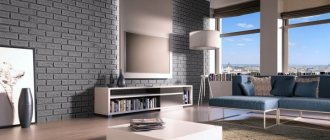
Decorating the walls of a country house
The walls in the country house can be decorated in different ways. It all depends on your desires and financial capabilities.
Painting the walls. Choosing paint
The simplest solution for decorating a dacha is to paint the walls. To do this, you can use one of the following materials:
- Water-based paint. This method is the most acceptable. Absolutely anyone can paint walls with this paint. The advantages of using water-based paint for painting the walls of a country house are its good solubility in water, the absence of an unpleasant odor and fast drying time. It is completely safe for health. In addition, it can be given any shade.
- Acrylic paint. Acrylic resins are used for this material. This paint dries quite quickly. Forms a film on the surface. The paint has no unpleasant odors and has excellent characteristics. By painting your walls with acrylic paint, you will give them a perfect look. If necessary, the paint can be colored to the desired color.
- Decorative paints that allow you to model and perfectly copy surfaces such as silk, sand or stone. This material is environmentally friendly. You can use stencils to decorate walls. If desired, you can paint the walls, giving them a gorgeous glazed effect.
- Ecological paints. They do not contain components harmful to our health. This is an excellent option for families with allergies.
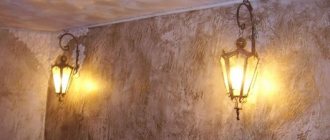
Plastering
A good solution is to decorate a country house using decorative plaster. For these purposes, you can use Venetian plaster or bark beetle plaster.
Venetian plaster creates an imitation of materials of natural origin. Plastered walls are incredibly durable. This finish can last up to 18 years. It is resistant to moisture and permeable to air. The only drawback of this finishing option is the high cost.
Bark beetle plaster allows you to obtain a texture reminiscent of wood damaged by wood-boring beetles. Actually, this is where the name of this finishing material comes from. This option pleases with its ease of application and bright design, which can be seen in the photo below.
Bark beetle plaster will give the walls of a country house a certain naturalness and primitiveness
Plasterboard finishing
If you want to change the decorations from time to time, you can use sheets of drywall. Essentially, plasterboard sheets (GKL) are alabaster, which is pasted over on both sides with cardboard. This material is not very durable. It is afraid of moisture, so it is not always advisable to use it on the walls of a country house.
A worthy alternative to gypsum plasterboards are gypsum boards. Alabaster is also used as a filler here, but with reinforcing fibers. Cardboard is replaced with a moisture-resistant coating made of durable cellulose. You don’t even have to be afraid to drive nails into walls covered with this material. In addition, GVL is moisture resistant.
Clapboard finishing
Another good option is to decorate the interior of a country house with clapboard. The material is completely natural and environmentally friendly. Its design is unique and at the same time extremely practical. Wooden lining does not rot, fungus and mold do not appear on it. The thing is that during manufacturing it is impregnated with special compounds. This finishing material is strong and durable. It will last at least 15 years.
Cladding with clapboard is the best option for finishing a country house
The wood texture looks very beautiful. You can choose your preferred shade and pattern. Wood finishing is suitable for all rooms.
Covering walls with clapboard is very simple. This option is the most affordable. First, guide slats should be placed on the walls every 50 cm. The slats are attached to them using mounting brackets. Next, the lining can be treated with a special antiseptic and varnished. It all depends on the chosen room design.
Wallpapering
If you want to decorate the walls in your dacha, you can use wallpaper to decorate them. Today there are a huge number of types of this material, but there is no need to choose expensive options.
It is worth remembering that the coating for the walls of a country house must be durable and strong.
It will take literally a few days to paste. Anyone can master the gluing technique. With the help of wallpaper you can change any room. An excellent solution is a combination of wallpaper of two colors.
When choosing wallpaper for decorating a dacha, it is better to choose an inexpensive but practical option.
The most affordable and popular finishing material is paper wallpaper. However, before you start gluing them, you need to carefully prepare the walls. It is better to take two-layer types, as they are much stronger.
Pasting such wallpaper is very simple. In addition, they will last 5 years. This option is inexpensive, so you can change it to other wallpaper for your dacha at any time.
There are duplex types coated with impregnation. They are resistant to moisture and are not afraid of light. Therefore, when choosing wallpaper for a summer house, many people prefer it.
Vinyl wallpaper will look really noble. This material is universal. The assortment also pleases with its diversity: there is foamed vinyl, silk-screen printing, and hard vinyl. They are very durable and do not fade. When finishing, you don’t have to prepare the walls so carefully, and if they get dirty, you just need to wipe them with a damp soft cloth.
Vinyl wallpaper is well suited for hallways and bathrooms. Today, options are available with special micropores that allow the walls to “breathe”.
There are also bamboo, textile, non-woven, cork, and liquid wallpapers. But these types of garden decoration are not used so often.
Although bamboo wallpaper is not used as often as other types, it looks very natural and stylish inside a country house.
Other finishing options
You can use laminate to decorate the walls of a country house. No matter how unusual it may sound to us, laminate is not only an excellent floor covering, but also walls. However, preference should be given to moisture-resistant options.
Many today prefer special plastic panels. This coating is inexpensive and practical, and comes in many different colors and textures. In addition, plastic is the most durable material that is unpretentious during operation. Installation is carried out in almost the same way as linings.
Choosing a material is quite difficult. It all depends on your preferences and desired design.
Finishing walls and floors in a country house with laminate is rarely used, but in this case the house will really be very original and unique
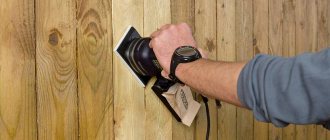
Preparatory stages
Proper preparation of the lining for painting makes it easier to work with the material in the future. New dried boards should be cleaned of dirt. If it is very dusty, you can use a damp cloth and baking soda. Then it is necessary to eliminate all defects.
The wood is sanded with pumice or fine sandpaper. Small particles are removed and primer is applied.
If the lining has already been used, preparatory work includes mandatory cleaning of the old coating. Paint and old varnish are removed with solvents. Multilayer dried materials are removed with a metal brush, hairdryer, or construction spatula.
If in the future the old lining will be covered with transparent varnish, then it is better to use a mechanical cleaning method. Solvents and removers can whiten the surface unevenly.
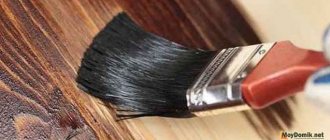
Applying paint
It is easier to paint wooden lining before its installation. The solution should be applied in a thin layer, slowly moving from top to bottom. If a brush is chosen for work, it should have semi-stiff bristles. To avoid streaks, do not put a lot of paint on the brush.
The roller should have medium-length pile.
After dipping it in paint and rolling it along the tray, the tool is pressed against the paneling with moderate force and rolled several times. There should be no voids or smudges on the surface. If the boards have already been assembled, their edges must be painted with a brush. Painting with a spray gun will be faster, but some of the paint will scatter onto nearby objects.
Glazing and tinting compounds (varnishes, waxes, mastics)
You can add shine and a slight tint to the surface using:
- varnishes based on acrylic polymers: environmentally friendly water-based compositions (sometimes called aqualacs), no pungent odor, vapor permeable, dry quickly, resistant to moisture; however, the surface will need to be updated periodically;
- alkyd varnishes: they form a more durable shiny film, they are easier to work with than acrylic, they are easily smoothed and do not leave streaks; but a completely transparent surface will not work; it will have a yellowish tint, which will become brighter over time;
- polyurethane varnishes: the most wear-resistant compounds that even cover parquet floors; the layer after drying remains elastic and does not crack; but they cost more;
- glazes for wood: they do not form a film on the surface, the material remains matte in appearance, but the surface becomes elastic and resistant to mechanical stress; There is also a thick-layer glaze, after application of which a thin film is visible;
- tonics and stains: they have no protective properties, they only give the wood the necessary shade, they are used mainly before applying a layer of varnish;
- beeswax: forms an aesthetically attractive coating that can protect the surface from darkening and insects; a pleasant aroma always reigns in a room decorated with wax; however, it takes a long time to dry, the surface is not very durable, it is easy to scratch; plus in the heat the wax softens and becomes sticky.
Design
Many home owners prefer not to paint the lining and preserve the natural pattern. But in order to prolong the original appearance, the wood should still be treated, otherwise the walls may darken or acquire a blue tint.
To get rid of the gray tint on wood, you will first have to sand the top layer, and then treat the surface to protect it from sunlight.
It will be more difficult to remove the blue tint - for this you need to use biological agents. Chlorine and active oxygen will help cope with the task. After treatment, the surface must be impregnated with a protective composition, and then painted with thick or translucent paint.
Natural wood shade will not harmoniously complement all interiors, so the walls can be painted.
A large selection of painting methods allows you to create an exclusive coating. To do this, it is important to choose the right paint color. Don’t forget about simple rules: light shades visually expand the space, while dark shades, on the contrary, make the room smaller.
Below are some recommendations and tips that will help you choose the right color.
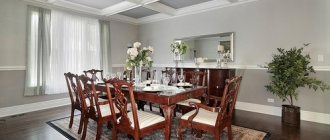
- Warm and calm shades look great in the kitchen interior: yellow, orange, pink and peach.
- A honey-golden shade combined with a natural wood pattern looks great in the living room. The interior can be diluted with light shades or bright and catchy colors.
- For the office, you can choose natural wood colors. In this case, oak looks great, but the lighting in the room must be well thought out. Cool tones will also help you get into a working mood.
- In the bedroom it is better to use wood shades or light and neutral colors. White also looks great when decorating the walls in the bedroom.
- You can use any colors in a nursery, but psychologists advise against bright and saturated tones - it is better to choose calm and moderately bright shades. They will not only create a special playful mood, but will also help the child relax and get ready for sleep and rest.
Lining painted gray and blue will create a feeling of dampness and cold, so it is wiser to use such shades in sunny rooms.
The lining can be mounted in various ways:
- Vertical. Will allow you to visually raise the ceiling. This technique is especially good to use in combination with light shades.
- Horizontally. Helps visually lengthen the wall and create the effect of expanded space.
- Diagonally. It will create special dynamics in the interior and allow you to make a spectacular accent on the wall or ceiling.
- Alternating. Allows you to create a special charm with a simple technique. For example, you can depict various shapes on the wall: a herringbone, steps and other combinations that the homeowner’s imagination can create.
Natural style
Finishing work is simple. They begin without waiting for the house to shrink; it is not necessary to pre-finish the floor and ceiling. The option that is the most profitable from an economic point of view.
Natural styleSource vip-1gl.ru
However, the method does not allow hiding communications; the coverage will have to be updated every five years.
According to fire safety rules, in wooden houses the main part of the electrical wiring is laid on the outside of the building, so there is no need to hide it.
Work order
Wall decoration in a natural style is done as follows:
- Logs (outside and inside the house) are polished with a grinder and flap wheels of different grain sizes, 36-150 units. Sanding removes mechanical damage and unevenness caused during the construction of the building. Internal grinding should be carried out in several layers, special polishing agents are used. Sanding is often carried out during the construction stage.
- Next, the wood is impregnated with a special agent. The impregnating agent can be colorless or tinted to a specific color. After impregnation, the surface becomes smoother and matte.
- Coating of wood with protective varnishes, making the color of the wood more saturated and the texture more contrasting. Apply at least 2-3 layers
Wood treated in this way looks very impressive, while it almost does not absorb moisture or dust.
Application of jute rope
Often, jute decorative rope is used for interior decoration of a log house assembled from rounded timber.
Decorative rope for finishingSource kanatmarket.ru
Sequence of work when laying decorative rope:
- Cut the rope to the required length.
- The edges of the rope are wrapped with thread and coated with varnish or glue by dipping.
- The rope is impregnated with water-repellent agents.
- Using a gun, thermal glue is squeezed into the inter-crown joints.
- A jute rope is laid, and nails 15-20 cm long are driven into it.
- Cover with varnish.
The rope is not expensive, allows you to hide defects between the joints, additionally protects against drafts, and gives the wall a more refined appearance. But finishing with rope becomes a more labor-intensive process.
How to choose a dye color
- In the living room , it is better to use materials for painting that emphasize the wood texture and give it a golden-honey hue. Additionally, you can use bright, saturated colors in the design.
- In the kitchen , the best paint colors are orange, peach, pink or yellow.
- The office is usually decorated in cool colors or the wood is kept in natural color. The room is sheathed with slats, which are then opened with varnish or wax.
- For children , soft, calm, soothing tones are chosen. You should not choose flashy tones that excite the child’s psyche.
- To paint the bedroom, neutral, light shades or clear varnish are used.
Lining painting techniques
- Brushing. Painting option for soft wood. First, remove their top layer with a coarse brush, then the surface is sanded and covered with stain.
- Patination. Two colors similar in tone are used. First, a thick layer of the first shade is applied to the wood and dried. Then a second lighter one is applied and also dried. The surface is sanded.
- Paraffin coating. Gives the surface abrasion. Paraffin is applied unevenly, then the lining is patinated. After drying, the paraffin is removed with a spatula. The surface is opened with stain.
- Bleaching. The base is covered with acrylic pigment or stain, and a layer of oil is applied on top. For a beautiful design, excess dye is removed and the surface is rubbed. The technique is used for painting white while maintaining the texture of the lining. When applying stain, do not pour too much mixture.
To get the desired shade, it is better to paint in several very thin layers, each of which is given time to dry completely.
- Furniture painting. First, the stain is applied, then the surface is primed twice. When the soil dries, the lining is sanded several times. To obtain a matte finish, the lamellas are first sanded with 280 and then 320 grit sandpaper. After removing the sanding dust, the wood is varnished.
Bleached oak is the basis of modern interiors
Decorating houses and apartments in the popular loft and scandi styles is only possible using white. An extraordinary solution that will allow you to achieve interesting visual effects is the design of painting the lining to resemble bleached oak, and the wood for the slats in this case can be any kind.
With the help of frost stain, white oak tinting and clear oil, the job will be done quickly, simply and effectively. The pigment applied in a thin layer is simply covered with oil after complete drying, and if a more pronounced effect is needed, it is additionally rubbed with a rag or fine sandpaper. Work carefully only with lining made of spruce or pine; the white paint on it may turn yellow over time.
How to paint lining like bleached oak
Often it is necessary to paint the wood white, but so that the veins are visible. They also say to create the effect of bleached oak. There are several ways:
- Use tinting with the appropriate name, which is also called stain. Different manufacturers have these.
They usually have the names "frost", "bleached oak" or something like that. Application feature: do not pour too much composition. If you overfill it, the surface will begin to peel off over time. To achieve the desired degree of coloring, apply several very thin layers. After each, give it time to dry thoroughly.
- Oil with wax with a similar name. The application technique depends on your desire: one or two layers for an almost opaque coating, or one layer followed by rubbing with a rag for a pronounced texture.
- Pigmented polyurethane primer called “white” or “bleached”. To obtain a translucent coating, the composition is diluted with a large amount of thinner. Its amount can be 80-100% of the volume (determined by samples). The disadvantage, like all polyurethane paints and varnishes, is that they turn yellow over time.
- Pigment acrylic primer , also diluted by 80-100%. The color remains white for a long time, but this primer costs more than polyurethane.
It’s hard to say which composition to choose - you need to try
It is advisable to paint the lining with several compounds and compare the results. The effect when using different products is slightly different, but it also greatly depends on the wood. The reviews are also very different - some whitened with tinting, others with oil. Soils are rarely used for these purposes, but mainly because not everyone knows their properties.
Some practical tips
As with every job, painting lining has its own tricks that help make this process easier and more efficient.
- To obtain the desired result, the panels at the ends should be primed and painted several times. A cross-section of wood has greater absorbency.
- If you decide to use drying oil to protect wood, then you need to take into account that it has a specific smell. And the treated surface will darken over time.
- If you decide to paint or varnish the new lining, then you can complete all the necessary work before installation. In a horizontal position it is easier to paint, and you will avoid drips and omissions.
- When thinking about what and how best to paint the lining white inside a country house, remember that the panels must be pre-treated with a primer, and it is better to apply the paint with a brush. This will ensure an even layer is applied. Otherwise, in unpainted areas, the lining will look like an old and stained coating.
Lining in the interior of a summer house kitchen
- If, at the stage of preparation for painting, it is impossible to wash off some contaminants on the coating and eliminate defects, degrease the surface with a solvent. And then paint it with several layers of paint.
- You can easily remove paint from your hands with vegetable oil. Simply apply it to the stained area of skin and wash off with soap after 5 minutes.
Wood is a beautiful, natural finishing material, which, however, requires protection. Which one? It's up to you to decide!
Secrets of decorative wood staining: techniques and tricks
City dwellers want to preserve the natural color of wood as much as possible. For those for whom wood in the house is a boring everyday thing, paint the interior lining in some unusual color.
Modern paintwork materials allow you to achieve different effects. For example, textured or brushed lining, but in two colors. This technique is often used in loft style interiors.
The trick is to apply two layers of different colors. The first layer is a dark color, the second is a light or brighter color.
Painting in two colors may not be the same. You can make the recesses a darker color, and only slightly tint the face (front part) or do everything exactly the opposite. The result is a striped wall made of clapboard - the effect of a slatted wall.
Stages of painting
The process of painting lining
Regardless of what you decide to use to paint the lining inside the house, you must strictly adhere to the technology and carry out the work in stages.
- Surface preparation:
Before starting painting, we clean and treat the lining with fine sandpaper to remove roughness on the surface of the coating. Then you need to wash the panels well with a brush. If necessary, use special detergents and cleaning products.
- Primer coating:
The next mandatory step is applying a primer. Indoors, it is better to use a water-based product without unpleasant, persistent odors. When choosing a primer, it is also worth considering the type of wood that will be processed.
It is also recommended to treat the wood with antiseptic agents that will protect the panels from insects, mold, and moisture. Good impregnation does not emit odors or harmful substances. You can decide right away what you can use to paint the lining in the bathhouse or inside the house. It’s better to start painting after the lining has dried well, after 2-3 days.
- Painting:
Painted lining at the dacha
You can paint lining using brushes, rollers or a spray gun. You should not move the brush several times over one place, as you should end up with a thin layer of paint. To make the coating uniform and the color you want, apply several thin layers of paint.
The painting process is not particularly difficult; you can do it yourself. You just need to think in advance about the best way to paint the lining inside a country house and purchase the necessary materials. Having done this, feel free to get to work.