The benefits of drawing for children
Why do all teachers and psychologists recommend starting drawing with children as early as possible? Teaching your child to draw is really important. Creativity is useful for children of early and preschool age for the following reasons:
- stimulates fine motor skills and logic;
- develops speech;
- helps formulate thoughts and suggestions;
- improves the function of self-expression;
- promotes self-affirmation;
- teaches making non-standard decisions;
- develops memory and attention;
- helps improve diligence and perseverance.
The process of drawing for children 2-3 years old and even younger will give a lot of joyful emotions and help diagnose various problems - medical, psychological. Drawing fights complexes, isolation, and self-doubt. This art also lays down the aesthetic perception of the world and reveals the creative inclinations of the child from an early age. Drawing with parents is a reason for additional time together and entertainment.
Age at which drawing began
The need to draw in a child may arise at a young age - at 1 year or a little later. Most children have a clearly visible craving for bright colors and a desire to depict something on paper by the age of 1.5-2 years. Of course, the first drawings are painted spots, but the child works more and more actively each time. Also, often his “talents” become noticeable on furniture, walls, wallpaper, but psychologists do not recommend strongly scolding a child for this, so as not to discourage the desire to create.
By about 4-5 years old, children can already begin to attend drawing lessons if they have the desire and inclination. You can learn to draw beautiful pictures at home, studying with your parents. There are now a lot of useful master classes and thematic information on the Internet. Children 7-8 years old and older can attend school drawing classes, where they will be taught about the basics of painting and taught many interesting things.
Features of organizing a workspace for a baby
It is very important to organize a workspace for the baby in the children's room, in which he will be comfortable and interested in studying. A properly equipped workplace sets the child in the right mood.
During drawing lessons for 3-year-old children, it is advisable for parents to be nearby to answer the child’s questions and help overcome difficulties if any arise.
All creative materials - albums, paints, brushes, pencils - should have their own place, and the child should have free access to them. If parents decide to hang shelves or cabinets on the walls, then it is recommended to do this at the height of the baby, so that if he wants, he can easily get something from them.
Coloring pages on traffic rules for a preschooler 3-4 years old
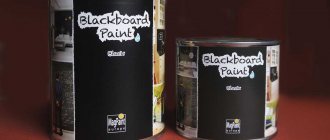
When children 3-4 years old are taught to draw, a chalk board or a wall coated with special paint will become a useful interior detail.
Note! Displays on the walls of the room from works made by the child will add motivation to work.
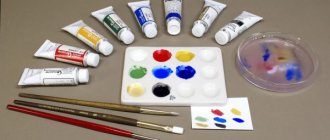
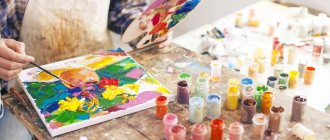
What colors are suitable - choosing a material for children's creativity
For young children, it is recommended to choose finger paints that are ideal for painting with fingers and palms. They can also be used later using a brush.
Children from 4 years old can already purchase gouache for drawing. These paints are perfect for beginners. Their density allows you to consistently apply colored layers and paint over damaged fragments. Usually, for coloring or drawing pictures in an album, a set of 6 colors is enough, from which you can get many new shades. For older children, it is better to buy larger sets - 10 colors or more. From the age of 6 you can already switch to watercolor paints, and at the age of 7-9 you can use acrylic dyes for creativity (for example, for painting on foil, fabric).
Finger painting classes
The very first paints for the youngest children are finger paints. Why them?
But because from a very early age, children's fingers become the main assistants in exploring the world around them.
And they can work with these tactile instruments, applying artistic material to them.
But there is no format for working with finger paints; children can work with them independently, creating doodle drawings.
However, some features of working with them are still worth noting:
- To work with paints, you need a large canvas, since small children do not feel boundaries and can go beyond them;
- Children need to start drawing only in a good mood, otherwise the little artist may refuse to participate in the creative process;
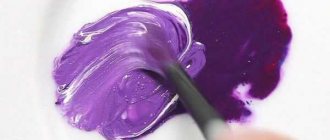
- In the first lessons, you should pay attention to only one color of paint, for example, on the first day you should introduce yellow, on the second with red, and on the third with a green tint. And only after a while are you allowed to mix colors;
- The first lessons should last no more than 5 minutes, gradually increasing the time of creative play, but not going beyond half an hour;
- Show the kids that you can draw not only dots, but also lines using your fingertips.
And when the child grows up a little, you can begin to move with him from scribbles to such working methods as:
- Finalization of drawn scenes. For example, cars are drawn without wheels and the child’s task is to complete the wheels with their fingers, or vases are drawn without flowers and they need to be completed;
- Finger painting in a stencil – painting with your fingers a stencil picture, for example, animals;
- Palm drawings - use not only the fingertips, but also the entire palm in creating drawings.
You can also start trying to use children's coloring books, and later move on to coloring them with pencils and a brush with watercolors.
Start drawing - selection of drawings
When drawing, you need to act in stages - move from easy to complex. Mom can give the baby “lessons” in drawing as soon as he is able to hold different objects with his hands. First, it is advisable to offer the child a pencil, after showing how to use it to make lines on paper. Having understood the meaning of the work, the child will treat it with interest.
From the age of 1.5 years, a child can already make the simplest drawings - dashes, similarities to figures. Gradually, tasks and goals become more complicated, but no strict demands are made on the child. On the contrary, it is desirable for him to go through the “staining phase”, which ends around the age of two. Further recommendations for creating drawings will be as follows:
- 2-3 years – initial skills in working with a brush, drawing flowers, geometric shapes, first snow, etc.;
- 4-5 years – painting, shading, working with pencils, brushes;
- 6-7 years and older - drawing compositions, landscape paintings, forests, animals, studying portrait techniques.
Distance drawing courses Art children
Website: https://art-deti.comPhonePrice: on request
Distance drawing courses:
Express course for kids. Includes familiarization with different techniques and approaches: plasticine, gouache, watercolor, pencils. The child will try to create in a fun way. Age 3-5 years.
Secrets of watercolor. Wet technique. Cold and warm colors. Drawing in reverse. Splashes of emotions. A simple and effective course in introducing watercolors. The course program is individual for everyone, taking into account age and wishes. Age: 7+ and adults.
Secrets of gouache. It is very comfortable to start your first experiments in drawing with gouache. Once you master this technique, it will be easy for you to move on to acrylic and oil. The lessons are suitable for both children and adults.
Creating a Book of Fairy Tales. A fun activity for parents and children to create together. The course will give key points in creating fairy tales about family members and what is around them. Elements of fairy tale therapy are included. Feedback from a psychologist and art therapist will be provided. As a result of the course, we create an amazing handmade book.
We create a handmade calendar. A beautiful and easy course for any age. Universal familiarity with all materials: watercolor, gouache, ink, oil pastel. Using the method of association and fairy tale therapy.
Graphic arts. The opportunity to learn to draw with pencils, pastels, and charcoal. Graphics help children learn to control their own hands, prepare for school, and develop thinking and creative logic. The course is also useful for children who are focused on the color black. Unusual techniques allow you to relieve tension and change your focus in a positive direction.
Sketch. The course teaches the technique of quick live drawings, while you will learn to convey atmosphere and emotions. The direction of the sketch is your choice: city landscape, everyday sketch, fantasy sketch. Age: 12+ and adults.
Coffee drawings. Coffee-art is an unusual technique for creating paintings using a specially concentrated coffee solution. As an addition to the course, you can take a lesson on painting with chocolate.
Leave a request for training, and you will be given a convenient time for a free consultation. If you decide to study, then fill out a creative form, a special course is prepared for you and your baby, taking into account your wishes. If desired, you can include knowledge of art therapy for parents in the course.
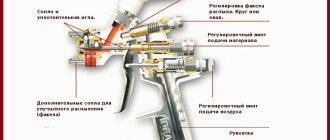
Other drawing supplies
No less close attention than paints should be paid to the choice of brush. Its handle should be reliable, preferably made of strong plastic so as not to break. The iron capsule must be smooth so that the child does not scratch the skin. The diameter of the brush is the same as that of a regular pen. Bristle brushes that do not absorb much paint and make even strokes are good for children. The length of the brush should be such as not to touch the child’s face.
List of what else may be required for drawing:
- Markers. They are bright and allow you to create a beautiful drawing quickly and effortlessly. Some markers are even blown onto the paper in the form of “colored rain.”
- Pencils. Less bright, but they don’t stain your hands.
- Crayons. Indispensable for painting on asphalt. The sizes of the crayons should be large so that the child does not damage the skin on the asphalt. You can also use them to draw on the board at home.
- Wax crayons. Well suited for painting shapes inside the outline.
- Paper. The A3 format is ideal for children; older children buy standard A4 albums.
- A simple pencil. Helps create basic contours. It's better to take a pencil marked HB, it won't crumble.
- Eraser. An important tool that allows you to erase incorrectly drawn contours and details.
- Sharpener. It’s better to buy a good one right away, since cheap ones quickly break down.
- Water jar. A regular glass will also work, making it convenient to rinse the brush.
Drawing with pencils, felt-tip pens and crayons
During lessons, make sure that your child holds the pencil correctly in his hand, confidently, but not too tightly, and holds the sheet of paper with the other. The quality of pencils plays an important role. They should not break, but be soft and greasy. The richer the palette, the more interesting it will be for the little artist.
By drawing with pencils, the baby learns to control the force of pressure. If you need to paint a part brighter, press a little harder; to get a light shade, you need to loosen your hand slightly. Make sure that the child does not leave gaps in the drawing and does not go beyond the edges. It is better to paint over a separate part of the image without lifting your hand from the sheet.
Line drawing will help your baby develop a sense of symmetry, rhythm and balance . This technique allows you to focus on the shape of objects.
Wax crayons are also an excellent drawing tool. They are bright and easy to paint over large details. As for felt-tip pens, experts do not recommend them, because... They will not be able to mix colors, and the baby does not need to control the pressure. However, children love them very much for their brightness.
Drawing lessons from 2 years
Before starting the lesson, it is important to make sure that the child’s workplace is well lit. He must get all the accessories without getting up from his chair. It is better to cover the table with thick oilcloth, which is easy to clean, because children at that age greatly soil everything around them during classes.
It’s worth starting the first lesson with the finger technique. Description of the process step by step:
- Mom or another adult dips a finger in the paint, makes a print, or runs it across the paper. Literally 1-2 strokes are enough.
- You need to invite the child to do the same. You can take one of his fingers, moisten it with paint, and put a spot on it.
- It is recommended to help your child draw a light picture with his finger – a petal, a caterpillar. You can make the sun with rays.
Next, you can work with your baby as much as possible, allowing him to make drawings on his own and with the help of adults. You should not give paint in large containers; small jars are enough so that your entire hand does not fit in them. The best option is to buy a special set specifically for this age.
Closer to 2.5-3 years, you can already master other artistic techniques. For example, the “blot” technique is performed like this:
- mom bends the sheet in half, on one side draws any picture in gouache, for example, a butterfly wing;
- presses the halves of the sheet tightly against each other, allowing the wing to be imprinted on the clean side;
- helps the child do the same actions by drawing a blot, a figure, a leaf, a flower and other pictures.
By the age of three, a child can usually trace stencils that can be purchased and printed from the Internet. They can be left as outlines of the drawing, painted over, or shaded.
The easiest way is to start with stencils of geometric shapes - circles, squares, triangles. Also at this age, you can make prints of your entire palm, painting it with gouache. Mom should show how real pictures are made from a series of such prints - bouquets, sun, trees, etc.
Step-by-step creation of drawings by children
The most important thing in learning any type of creativity is constant practice. Before learning to draw complex, intricate paintings, a child must gain an understanding of simple shapes and the basics of composition.
They should not limit the imagination and desires of the young artist, but only guide.
Snowflakes and winter ornaments
The image of snowflakes develops imagination and abstract thinking well.
Procedure:
- Draw a circle. Place a dot in the center.
- Focusing on it, cross out the circle horizontally, vertically and twice diagonally - you should get 8 lines inside. This will be the base of the snowflake.
- The blank is filled with circles, lines, zigzags, polygons and other shapes, creating an individual pattern. Similar actions are performed with each beam, maintaining symmetry.
It is worth giving your child creative freedom and the opportunity to draw according to their individual skill level.
Winter motifs in drawings.
Red Apple
Images of fruits and berries are the basis of most educational programs. Using their example, the child understands the basics of lighting and darkening, and color selection.
Steps for drawing a block:
- Draw a circle. Adjust the shape of the top and bottom parts to create the silhouette of an apple. Draw a line (“dimple”) in the upper part, mark the stalk and leaf.
- Apply the first layer of watercolor. It should be light, almost transparent. The apple can be decorated in green, yellow, red colors or a combination of shades at the child’s discretion.
- Color the fruit in a basic tone, skipping areas of highlights.
- Starting from the top of the apple, apply shadows, adding specks of paint and gradually stretching them with a brush.
Having completely painted the base, they begin to draw the stalk and leaf, thicken the outline and other finishing touches.
Fruit still life.
Watermelon gouache
Drawing a watermelon is another easy way to become familiar with basic shapes in painting.
Step-by-step instruction:
- Draw a triangle. Erase one of its sides and replace it with a semicircle, and also make the opposite vertex rounded.
- Inside the resulting outline, select the peel and the layer between the peel and the pulp.
- Paint the main part of the watermelon red. Highlight the layer between the pulp and the peel in green, making a smooth transition.
- Color the peel deep green. Add some dark stripes.
Lastly, you can add a few dark brown and yellow watermelon seeds.
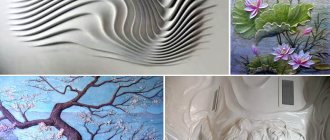
Drawing landscapes
Using paints, it’s easy and quick to paint landscapes - from forests and mountains to the sea or the night sky.
The specifics are different, but the technique remains the same:
- Draw a pencil sketch. It should be as simple as possible and indicate only shapes, without details.
- Paint the background with primary colors: for example, sea and sand or field and sky. Draw large objects such as plants or mountains.
- Apply shadows and highlights. Add surroundings: clouds, waves on the water, etc.
Lastly, small details are completed: seagulls in the sky against the backdrop of the sea, fruits on the trees, etc.
Landscape with colors.
Flowers with paints
Drawings with flowers are easy to make, give scope for the child’s creativity and always turn out bright and beautiful.
Step-by-step instruction:
- Draw the outline of the flower on the paper. When painting with paints, it should be a silhouette without small details.
- Paint the petals with the main color. Then take a dye several shades darker and apply it to the ends. The border of shades is blurred, making a smooth transition.
- Paint the middle of the bud with a lighter tone. Make a transition with strokes from the center to the tips of the petals.
- Draw the core and several stamens.
At the end of the work, add stems and leaves
They are made sketchy, without details, so that the main attention is drawn to the bright bud
Drawing at 3-4 years old
At this age, you can begin to master new techniques and gradually accustom your child to making real gouache drawings. Here are some ways to get creative:
- dabbing - placing light spots with a brush from which an image is formed;
- strokes - with the help of lines made in different directions, original drawings are also obtained;
- drops - you can dip the brush in paint, let it drip onto the paper, and then form fancy patterns;
- wet drawings - moisten the sheet a little, drop some paint, watch how it spreads over the paper;
- sketches - by the age of 4 you should try to draw them with a simple pencil, then shade them and paint them over;
- girls, boys from figures - you need to show the child how the outlines of a person are obtained from the simplest contours.
Also, a child aged 3-4 years is trusted to work with a sponge. You can even put colorful imprints on the paper with your fingers, palms, and then make strokes with a sponge to give the drawing a finished look. At 3-4 years old, it is enough to draw three times a week for 10-20 minutes. This will prevent you from becoming satiated with this activity, but will also not allow you to abandon it.
Drawing lessons from 4 years old
As the child grows up, he already draws more complex pictures - autumn or winter, the underwater world and space, of course, based on his vision. At first, the results may turn out angular and spreading, but at 5-6 years old, children who began training at a young age usually draw such pictures well. It is very important to talk with children about their creativity - what is depicted, what characters, what they do, etc. It is necessary to keep the child’s work, this will give him confidence in the significance of his work.
A popular design for 4-5 year olds is an autumn tree or a winter Christmas tree. The technique for drawing a Christmas tree is as follows:
- make a vertical line;
- draw slightly curved lines - branches;
- outline the branches with green needles, making them fluffy;
- draw the trunk brown;
- After drying, make marks with white paint among the greenery.
It is also recommended to draw a hedgehog with your child; the work will take a maximum of 12-13 minutes. First, outline the hedgehog's body in zigzags with a pencil, then add ears, an oval with a sharp nose - the head. The paws are drawn below. Afterwards you can do more delicate work - make eyes, nose, mouth, paint the hedgehog with colored pencils and paints.
Children also love to draw owls, donkeys, cats and dogs. You can take geometric shapes as a basis, to which you can then add paws and tails. It will not be difficult to draw a person - a circle, ovals and elongated rectangles will suffice. Children from 7-10 years old, if they wish, can try themselves in portraits, still lifes and other complex drawings. If there is a need and ability, it is imperative to send the child to specialized training, where his talents will fully manifest themselves.