DIY repair
This calculator will help you calculate the required amount of paint and varnish materials. The calculation is carried out in accordance with VSN 447-84 “Standards for the consumption of paints and varnishes and auxiliary materials when painting steel building structures at the installation site.”
This calculator will help you calculate the required amount of paint and varnish materials. The calculation is carried out in accordance with VSN 447-84 “Standards for the consumption of paints and varnishes and auxiliary materials when painting steel building structures at the installation site.”
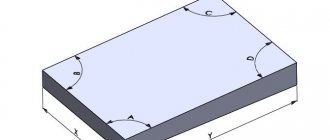
This calculation is used when it is difficult to calculate the area of the surface to be painted, but the mass of the metal structure is known.
This calculator will help you calculate the required amount of paint and varnish materials, given the basic characteristics of the paint.
- paint consumption table
- preparing the surface for painting.
- paint application technique
- painting windows and doors
- curbs
- coloring with lines
PAINT CONSUMPTION TABLE
| DYE | NUMBER OF LAYERS | PAINT CONSUMPTION (sq.m/l) |
| Water-based | 2 | 9-15 |
| Single-layer water-based | 1 | 8 |
| Water-based paint on fresh plaster | 1-2 | 11 |
| Acrylic paint | 1-2 | 10-14 |
| Acrylic paint for different types of surfaces | 1-2 | 10-12 |
| Texture paint | 1 | 2-3 |
| Cement based paint | 2 | 1-6 (sq.m/kg) |
Preparing the surface for painting.
Surface preparation often takes longer than the painting process.
If the walls, ceiling, baseboards and trim are new, they are in good condition for priming and painting. Make sure that the surfaces are free of dust, plaster powder and wood particles. To get rid of them, wiping the surface with a rag is usually enough.
If surfaces have already been painted and are to be repainted, some repairs are usually required.
The most time-consuming part of the work is examining the surfaces of the floor and ceiling to identify blisters and bubbles of old paint, cracks, holes and moldy areas.
Find out what caused the damage and eliminate the cause. Once the repair is complete, coat the surface with the recommended primer.
Cracks can also appear on a wooden surface. If a wooden element is very damaged or split, replace it. Around small cracks, the surface must be sanded, puttied with a special composition for puttying wood and cleaned again.
If the damage to the surface is significant, for example, swelling or peeling of old paint, then the surface in this place must be cleaned to bare wood. The old paint can be pre-softened with paint remover and then scraped off. You can also soften the paint with a stream of hot air from a hair dryer.
In the case of wood, it is best to remove paint using a water-soluble paint remover. Gasoline-based removers should be used on surfaces that could be damaged by water.
When all the paint has been removed, wash the surface with solvent, gasoline or water. Allow the surface to dry thoroughly before sanding.
Before painting previously painted surfaces, they must be sanded to a matte surface.
In order for the new paint to adhere well, this operation can be performed with very thin sandpaper or a liquid that dulls the surface during application.
Dirt and grease are removed from the surface by washing it with home remedies. Allow the surface to dry thoroughly before applying paint.
Remove black spots and scratches from the surface of the baseboard with sandpaper. Paint will not completely cover them.
Paint application technique.
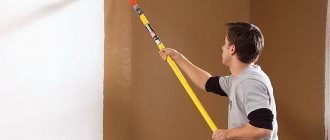
One technique for working with a large brush on large surfaces is to use a series of short, angled, overlapping strokes.
Once a certain area is covered with paint, for example a square meter, the paint begins to be distributed over the surface in short strokes, parallel to the floor.
The edge of the newly painted stripe, which will meet the next stripe, should be smoothly tapered off. When painting the stripe, start with a dry surface and work your way to wet paint.
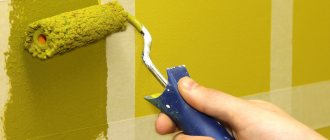
Applying paint with a roller is the fastest way to cover large surfaces, although it may require more coats than with a brush because the roller spreads the paint thinner.
When working with a roller, apply the paint in a series of random passes with a roller that has just been wetted with paint. Do not lift the roller from the surface once you have started to apply paint, otherwise sudden drops in paint thickness may occur.
Now, without lifting the roller, move it perpendicular to the first strip until you get an even coating.
Apply paint consistently to the entire wall. Try to complete one wall before taking a break, otherwise there will be a noticeable change in tone where you stop.
Painting windows and doors.
They usually start painting windows and doors after completing all other work. If you have already painted them, and you need to paint the wall, then do not allow paint to splash on the trim and frames.
Because the surfaces of windows and doors are frequently touched, semi-gloss or high-gloss enamel is usually used. Sometimes the surfaces of windows and doors are etched and coated with a clear varnish.
When painting windows and doors with glass elements, cover the glass with protective tape. This way you can paint near glass with more freedom.
Paint the window elements in the following order:
- horizontal binding elements;
- vertical binding elements;
- upper and lower frame elements;
- sidewalls
Move the sashes from time to time to prevent them from sticking to the frame. Let the paint on the sashes dry.
Curbs.
The interior can be more interesting if you apply a solid border with contrasting paint or a stenciled pattern near the ceiling.
To apply a continuous border, work in the following order:
- Measure the desired width of the border and draw a line - the bottom border of the border. The upper boundary will be the ceiling.
- Apply protective paper or plastic tape along the bottom border and on the ceiling close to the corner.
- Paint the space between the two tapes—the border—and let the paint dry. Then remove the tapes.
Stencils are used to apply a repeating pattern to the wall. The stencil can be purchased at the store. You can also buy stencil material and cut out your own design in it.
Painting wooden baseboards
Let's look at how to paint a wooden floor plinth. First of all, you need to prepare everything you need for work.
- Wooden plinth;
- Brushes;
- LMB;
- Composition for primer;
- Masking tape, sandpaper;
- Sponge or rags, gloves.
We protect the surface of the walls and floor near the baseboard with masking tape, sticking it around the perimeter. If you work very carefully, you can place a wide spatula in the areas of painting and move it as the work progresses.
First, sand the planks with sandpaper to remove all roughness and minor defects, then the paintwork will lie evenly on the fillet.
To ensure that the paint adheres well to the surface, prime the fillet for better adhesion of the wood and paintwork materials.
Paint with a brush; the paint should be applied in a thin layer so that there are no smudges. After it dries, apply a second layer. Remove the tape only after it has completely dried.
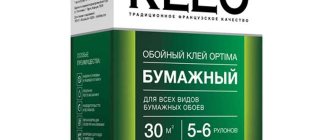
Wallpaper paint: types
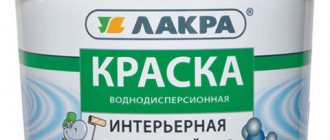
There are three most popular types of water-based paint:
- Acrylic. This popular coating is durable, moisture-resistant, and can be tinted in any color. The acrylic-based composition is environmentally friendly, does not cause allergies, and is safe for health, as it does not contain aggressive chemical components. Without smell. After drying, there is no film on the surface, so the wallpaper “breathes.” This property prevents the development of mold, mildew, and deformation of the material. Acrylic compositions are used in different rooms. The surface can be washed after applying paint, so acrylic compositions are suitable for rooms with high humidity. Can be used on any type of wallpaper.
- Latex. The most expensive type of paint and varnish composition. It is easy to remove dirt and dust from the dry surface; it is resistant to moisture. The paint does not contain harmful substances and is suitable for all rooms, including bedrooms and children's rooms. But when using latex coating, keep in mind that it is impossible to achieve a bright shade with it. The composition is more suitable for reproducing soft tones. Apply a thin layer. The coating does not allow air to pass through after drying. It dries almost instantly, so you need to paint the surface quickly.
- Water-based. This is a water-based paint - the cheapest of all on the market. The main disadvantage is low strength. You can wash it off the walls with water, that is, it is not recommended to wet the dried surface. When exposed to direct sunlight, the paint fades. More suitable for ceilings. The color after drying is a shade lighter - this must be taken into account.
In addition to composition and chemical properties, wallpaper paint also varies in appearance. It comes in glossy, semi-gloss, matte, semi-matte, pearlescent and even with sparkles.
Glossy compounds reflect light strongly. Please note that the walls on which the composition is applied must be perfectly smooth. Gloss emphasizes surface defects, but also transforms the relief of structural wallpaper.
Semi-gloss and semi-matte paint has optimal light reflection, is used in any room, but also highlights wall defects and emphasizes the depth of wallpaper embossing for painting.
Mother-of-pearl coatings look great in diffused lighting, and compositions with sparkles are best used in rooms where floor lamps and sconces are installed as lighting fixtures.
Matte compositions help create a chamber atmosphere and hide defects. Used for ceilings.
The paint dries from 3 to 14 hours. Drying time depends on the porosity of the surface, room temperature, air humidity, ventilation and layer thickness.
Functionality of the plinth
This seemingly inconspicuous detail in the interior is quite important for its overall design. It is difficult to imagine the respectability of a room in which there is no baseboard framing of the floor covering. However, this element performs not only decorative functions, since previously it had a different purpose.
In addition to the fact that when framing the floor covering it acquires a neat, respectable appearance, the plinth also performs other important functions.
- Initially, when arranging wooden floors, the baseboard was primarily intended for a kind of insulation. The fact is that there is always a gap left between the boards and the wall, which serves for thermal expansion of the wood. But such a remaining gap often became the reason for the unhindered flow of cold air from the underground. It was to avoid this that they began to fasten skirting boards along the walls.
- In modern apartments and private houses with concrete and other floors, the plinth serves to protect the edge of the flooring - laminate, linoleum or carpet, from damage and penetration under it, as well as into the gap between the flooring and the wall, dust, dirt and moisture.
- The presence of cable channels in the back wall of the plinth allows you to hide communications, for example, a television cable, telephone cable or for connecting to the Internet.
- Modern products have a very aesthetic appearance, which allows the plinth to be used as a special decorative element of interior design.
Rules for painting wooden windows
New windows
New wooden window
New wooden frames are much easier to paint, because they do not need to be cleaned of the old coating. But this does not mean that you can immediately apply paint - the surface should be properly prepared. It is recommended to paint the frames before installation and glazing, otherwise certain areas will remain unprotected and will deteriorate faster.
It is better to paint wooden windows before installation
Step 1. Place the frame on a flat, clean surface and sand it on all sides with fine sandpaper. This will help get rid of unnecessary roughness, small protrusions and other defects. Be sure to handle sharp edges, slightly rounding the corners.
Step 2. Carefully sweep away the dust formed during the grinding process, then carefully inspect the frame for chips, cracks and recesses from knots. As a rule, such defects are rare in new high-quality frames, but it is necessary to check.
Step 3. Identified defects should be covered with wood putty.
Oil-based putty is well suited for oil paint; for others, it is recommended to use acrylic putty.
Acrylic wood putty
Before applying the composition, all recesses are once again dust-free and, if necessary, dried with a hairdryer. The putty is applied with a plastic narrow spatula, carefully filling the cracks. If the recesses are wide, the mixture is applied in thin layers no more than 3 mm thick. The intervals between application of layers are 2-4 hours, depending on the composition.
Advice. To seal cracks in the window frame, you can make your own putty. To do this, take dry sawdust, sift it through the finest sieve and mix with wood glue to a paste-like consistency. After applying the composition, you need to wait for it to dry completely, and then thoroughly sand the treated areas.
Making wood putty with your own hands
If the frames are made of softwood (larch, pine), resin may appear on the surface. In such areas, the paint does not adhere well, and the varnish may not adhere to the wood at all, so additional processing is necessary. Small areas with resin are easiest to cut out with a sharp knife and seal with putty. If there are a lot of resin drips, it is more convenient to use a solvent - turpentine, acetone, white spirit and others.
The solvent is applied with a brush to the resin and rubbed until foam appears. After this, the surface is washed with warm soapy water and dried.
Prices for different types of paint removers
Step 4 . After drying, the treated areas are sanded to achieve a perfectly smooth surface. Next, wipe off the dust with a damp, clean cloth and allow the material to dry again.
Step 5. Clean, dry frames must be primed with protective compounds. If you plan to preserve the natural look of wood, choose colorless antiseptic primers, such as Pinotex Base, Belinka Base, Drevnokhron Ground and others.
Primer PINOTEX Base
Under oil paint, the surface of the windows can be treated with drying oil. To apply the primer, it is recommended to use a medium-width paint brush so that it is convenient to work and the composition is less splashed.
First, completely prime the frame from the front and sides, and when the surface dries a little, turn the structure over and process the other side. As a rule, new wood quickly absorbs the primer, and for high-quality impregnation it is necessary to prime it at least 2 times. And if the material is too porous, you will need 3 layers of primer. Maintain intervals between application of layers so that the composition is evenly distributed between the fibers.
Apply primer with a brush
Step 6. Once the primed frames are completely dry, you can begin finishing. Choose a convenient tool (roller, spray gun or brushes), thin the paint if necessary, and start painting the frame.
Window Painting Tools
First, paint the inner corners and areas under the glass using a thin brush, then paint the smooth areas. The layer of paint should be very thin, so do not put a lot on the brush or roller, rub the composition well over the surface. Shading is done in one direction, along the bindings, so the strokes will not be noticeable after drying. Remove drips and sagging immediately, it will be more difficult to do later.
Paint frames in a well-ventilated area
Having completed the work on one side, the frame is very carefully turned over and the second side is painted. To prevent the paint from getting dirty on the bottom, you need to place two blocks of wood wrapped in film or something similar using available materials under the frame. To give the surface a uniform deep color, you will need 2 or even 3 layers of paint. Follow the time specified by the manufacturer between coats.
Advice. For painting, choose a warm, windless day in dry weather. In the heat, the paint dries quickly, the brush drags, and this interferes with high-quality shading. In wet weather, wood absorbs moisture, which leads to reduced paint adhesion and the appearance of bubbles. Well, the wind brings dust and debris, which immediately sticks to the fresh paint.
While the frames are drying, you can paint the glazing beads that you will attach to the windows, as well as other wooden elements - trim, window sills, shutters, if any.
Over old paint
Method 1
If you are not going to change the windows, but only want to update the ones you have, the procedure is somewhat different from that described above. For high-quality restoration, it is recommended to carefully remove the frame from the window frame so as not to damage anything.
Step 1. First, dismantle the platbands, remove the windows from their hinges and lay them on a flat surface. Next, you should remove the glazing beads very carefully so that the glass does not crack. If window putty was used instead of glazing beads, remove it with a knife, wide screwdriver or putty knife. Be careful here as well, as the blade can easily slip and break the glass.
Removing old putty
Step 2. Since nothing is holding the glass in place, you can carefully pull them out and set them aside. Now the most difficult step is removing the old paint. There are several proven options:
- scrape everything off with a spatula;
- burn with a blowtorch;
- heat with a hair dryer;
- use washes.
Cleaning off old paint
To remove or not to remove old paint
The first method gives good results only if the paint is cracked and weakly adhered: it is enough to pry it from below with a blade, and the old coating will fall off in pieces.
Advice. If the paint holds very firmly, there is very little visible damage and the same composition is chosen for painting, it is not necessary to completely remove the coating. It is enough to sand the frame to remove defects.
Step 3. After removing the paint, wipe the frame with a clean rag to remove small particles and inspect the surface for damage. Rotten areas must be scraped out with a knife to a solid base, loose jumpers must be strengthened with self-tapping screws. Cracks, chips, and depressions are filled with putty.
Step 4. As soon as the putty has dried, the frame is treated on all sides with a sander or grinder with a sanding attachment. The surface must be absolutely smooth, even, without roughness.
Sand the applied putty
Step 5. The frame is primed, dried and the painting begins directly. Usually 2 layers of paint are enough if the surface is prepared correctly.
Be sure to apply primer
While the frame dries, the platbands are processed: the old paint is removed, sanded, and a protective impregnation is applied. Glazing beads are usually completely replaced with new ones, since they do not differ in durability. Next, they inspect the glass, replace cracked glass, and remove dirt and traces of old paint. The window frame should also be checked for damage, cracks and gaps should be sealed, and painted. Such repairs will extend the service life of wooden windows by another 10 years.
After the frame has dried, the glass is inserted first.
Fastening glass to a wooden frame
To ensure that there is not the slightest gap between the frame and the glass, you need to apply silicone sealant around the perimeter of the sample. To apply sealant you need a construction gun - this is the most convenient and fastest way. The sealant should be applied in a thin, even strip, without sagging. Having spread the silicone, carefully place washed and dry glass on top and press for a few seconds. Any sealant that comes out must be wiped off immediately with a damp cloth, since it is more difficult to remove when dry. Having secured one glass, proceed to the second, and so on until the end. On average, about 1 can of sealant is used for 1 window.
We insert the glass and apply window putty (instead of glazing beads)
Level the putty with a spatula
Allow the sealant to dry, after which the glazing beads are carefully filled. They act as an additional fastening for glass and perform decorative functions, since wooden windows with glazing beads look much more attractive. Now all that remains is to insert the frame back into the opening, secure it, and stuff the trim.
How to properly fasten a bead
Advice. The nails with which the glazing beads are nailed rust very quickly and leave stains on the glass, which significantly worsens the appearance of the window. To avoid this, use special copper-plated finishing nails (copper-plated).
Method 2
It is not always possible to remove the frames from their hinges and pull out the glass. In this case, you will have to work this way, taking care to protect the glass from paint. There are several options here: you can cover the glass with newspapers, treat it with soap foam, or stick on masking tape. Using tape is the most reliable and effective way. But first you need to remove the old coating from the window frame.
In such conditions, it is best to use a hair dryer or remover. Streams of warm air quickly soften the paint, and it can be easily removed with a spatula. To prevent the glass from heating up during the cleaning process, you need to use a special attachment on a hair dryer. Washing also gives a good effect; the paint quickly dissolves and is removed with a scraper. After this, the window is washed to remove the smallest particles of old paint and left to dry.
Removing paint from a window using a hair dryer
Next, the surface is sanded with sandpaper, smoothing out minor defects, cleaned of dust and the cracks are sealed with putty. After final sanding, apply strips of masking tape around the perimeter of the glass and begin priming and painting.
Protect the glass with masking tape
If splashes accidentally fall on an unprotected part of the glass, they should be wiped off immediately with a clean cloth. After applying the final coat of paint, carefully remove the tape from the glass. After the surface has dried, the tape comes off along with the paint, leaving visible marks on the frame.
Choosing paint and tools
Any paints and enamels are suitable for coating MDF planks. Water-dispersed acrylic compositions are the least harmful. They do not have an unpleasant odor and dry quickly. Glossy paint is hard to find these days. Therefore, if you want to add shine to the painted surface, then apply a layer of transparent varnish.
Paints and tools for painting MDF baseboards.
Additional materials and tools:
- a primer on the same basis as the selected paint - acrylic for acrylic paints, polyurethane for polyurethane, etc.;
- paint tray (tray) - one of its edges is beveled, making it convenient to squeeze out excess paint;
- brushes of different widths with synthetic bristles with a smooth edge - for applying the composition in a straight line;
- brushes with a beveled edge - for finishing corners;
- wide spatula;
- masking tape - simple tape will not work; when removed along with it, some of the paint from the baseboard or the coating from the floor and walls may peel off.
It is possible to use a mini paint roller instead of a wide brush. Using a primer is optional, but recommended. The paint lays more evenly on the primer layer. The finished decorative coating lasts longer. The consumption of the coloring composition on the primer is less than when applied to an unprepared surface.
Paint selection
For painting wallpaper, emulsion or water-dispersion paint is best suited. The approximate consumption of water-dispersion paint is 1 liter per 7-7.5 square meters of wallpaper surface (0.12 - 0.14 liters per 1 m2). The number of layers applied directly depends on the quality of the paint itself.
When using expensive paint, two layers will be enough; if the paint is cheap, you will have to apply three layers. The consumption of water-based paint is 1 liter per 8-11 square meters (0.1 - 0.13 liters per 1 m2) and it is advised not to apply it in a thick layer.
MDF skirting boards
Everyone is probably familiar with MDF boards, used as a facing material and widely used in furniture production. They are produced in a wide range of thicknesses and shapes, most often decorated with a special polymer film with a pattern, usually imitating various wood textures. MDF skirting boards are their closest “relatives”.
What is MDF? No matter how hard they try to freely decipher this abbreviation! Some argue that this is a designation for “fine fraction” or “modified fiberboard.” Interestingly, both options are quite close to the truth.
Varieties and tasks
The purpose of the plinth is to protect the walls from moisture and mechanical stress, so it must be durable.
The most popular types of skirting boards are wooden and MDF.
They are available plain or in white. Their advantage lies in preliminary preparation. To do this, a primer is applied to the canvas in several layers and, as a result, less time is spent on painting after installation. In addition, the installation of such a plinth is no different from the installation of a ready-made one. To do this, use glue, self-tapping screws, special clips or “liquid nails”.
MDF skirting boards are a durable and environmentally friendly product, the characteristics of which can be installed several times. It allows wet cleaning of the room and does not attract dust.
Although the surface of the MDF baseboard for painting is smooth, applying paint to it is not an easy task. The material itself is quite porous and during the dyeing process the pile rises, making the appearance not very attractive. To achieve a high-quality coating, priming is carried out in several stages. In this case, careful sanding after drying will remove all unevenness and roughness.
Wooden floor plinths are made from solid wood . This is a durable and reliable material. It is less demanding when it comes to painting; it is primed and painted with quick-drying paint.
Both of these options perform their protective function and hide wires and wallpaper edges well.
Painting technology
How to glue different types of wallpaper is usually indicated on the packaging, and any seller will be happy to advise you. Moreover, the gluing technology is practically no different from conventional single-layer trellises. For coatings for painting, there is one important limitation - most types of paper and non-woven ones cannot be pressed too hard, as the design can be damaged.
Many people are much more concerned about the question of how to paint wallpaper. All types can be coated with any dispersion paints; water-based solutions are most often used. Despite the good covering power of modern mixtures, it is better to paint in two layers - this will provide a more even shade. If the color is added separately, then water-based wallpaper paint is diluted for the entire scope of work with a small margin. Remember that the consumption will be slightly higher than indicated in the description of the material due to the texture of the surface being painted.
Paint for painting wallpaper is applied with a roller or using a spray gun; corners, small parts and hard-to-reach places are painted with a flute or small rollers (less than 50 mm). If you are going to use different colors, then use stencils and masking tape to get clear and neat borders.
The most important advantage of textured wallpaper is the ability to tint dirty areas or completely repaint it. No special preparation is required for this. Simply apply a new coat or two of paint.
Methods of fastening MDF plinths
There are three main methods for installing MDF skirting boards to the wall. When choosing one of them, you must immediately consider the possibility of dismantling. In some cases it is necessary, for example, in case of an emergency - when pipes leak and water penetrates under the floor covering.
Installing the plinth with clips is the most convenient way if a thrifty owner is thinking about the possibility of dismantling it if the need arises.
- So, MDF plinth can be installed on plastic or metal clips fixed to the wall. Clips come in different configurations, so they are selected for a specific baseboard model, so that they match the mounting channel on the back of the product. As a rule, such fasteners are included with the baseboard. By installing products in this way, you can be sure that they can always be removed and then installed back without any problems.
Preparation and painting of the product
1. Newspapers, masking tape and covering film are used to protect the surface from paint. Painting tape is glued to the walls and floor if the baseboard has not been painted beforehand, but is already fixed to the wall. A wide spatula and other flat-shaped objects will help those who are afraid of ruining the walls with tape. They are applied to the wall. This is a must for anyone wondering how to paint a piece.
2. Next, defects from the previous installation process are eliminated. To do this, use silicone sealant or fine-grained putty. The putty is applied to a rubber spatula. All that remains is to cover up the existing errors. The main thing is to accurately follow the curves of the profile, then they will be painted correctly.
3. A damp cloth helps get rid of excess material if you can’t paint evenly. You must wait until the base is completely dry. A warm sponge dipped in water is also an excellent helper in cleaning any dirt. Afterwards, the unevenness is removed using sandpaper.
4. For degreasing, we use any solvent, after which the surface is primed. This will reduce paint consumption and improve adhesion to the surface. If you use aerosol paint in a can, then the latter must be shaken before starting work, for 30-40 seconds. That’s the whole answer to the question of how to paint a product.
When painting, you need to be at least 20-30 centimeters from the wall. If you follow these rules, you will not have to worry about the appearance of drips. Aerosol paints generally cope well with almost any type of surface. The main thing is to first protect the work area.
Subsequent layers of paint on the surface of the floor and ceiling are applied only after the previous ones have dried.
After painting itself, it is allowed to use varnish. Then the color turns out deeper. Additional protection is provided by the coloring composition from abrasion and harmful microorganisms.
Paint consumption calculator
Find out the consumption of water-based paint per 1 m2 for plaster, metal, wood - calculation of wall paint by area using a calculator.
Scroll down to START (space for your content)
On this page you can find out the standard consumption of water-based paint per 1 m2 or calculate the total consumption for a specified area, for example, for painting walls. The tool allows you to select different application surfaces - the plastered surface is taken as the base one; for metal and wood, reduction factors of 1.2 and 1.1 apply, respectively. You can specify the paint consumption rate yourself, so the tool can be used to calculate the amount of facade, enamel and oil paints. Paint consumption for the second and subsequent layers is reduced by 30%. To get the calculation result, fill in the fields of the calculator and click the “ Calculate ” button. You might also be interested in enamel consumption and varnish consumption.
Related regulatory documents:
- SP 71.13330.2011 “Insulating and finishing coatings”
- GOST 12.3.005-75 SSBT “Painting works. General safety requirements"