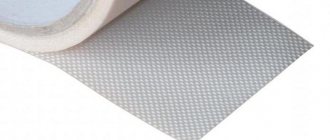
A short explanation of all the symbols on the wallpaper
If you don’t have time to read the entire article, then we present the meaning of the most common icons on wallpaper.
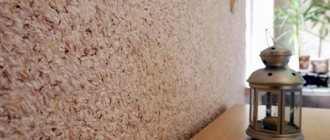
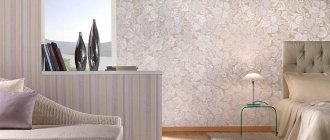
Varieties of wallpaper designs
Rapport is a special type of applying a pattern to wallpaper. If you are going to make repairs, then you need to familiarize yourself with all the many possible designs in order to be savvy in their choice and not get confused when you go to the store.
It is accessible and simple: - Abstract - a chaotic pattern in which you cannot name a specific object, but something like “blot”, “divorce”. - Geometric - according to the name, they depict geometric figures: circles, rectangular, polygonal, triangles. — Stripes - it would seem logical to classify them as abstract or geometric, but wallpapers with vertical or horizontal stripes are classified as a separate group. - Plain - wallpaper without a distinct pattern and one color. — Classic - intertwining lines, knots, each roll is part of a certain picture. This is often called wallpaper with monogram patterns. — Floral wallpaper depicts various floral figures. — Ornamental - with patterns of alternating elements.
IMPORTANT! Each type of drawing requires an approach. For example, abstract and monochromatic ones can be glued as you like, but classic or geometric ones need to be joined to get the correct image.
Decoding the markings on the wallpaper
Wallpaper from any manufacturer is marked with symbols in the form of drawings. The pictograms on the label provide information directly about the characteristics of the wall covering.
If you plan to wash the wallpaper in the future, or the coating will be applied in a room with high humidity, you need to look for rolls with a wave icon. This designation will tell you about the wallpaper care options.
| Water resistant . The wallpaper is suitable for rooms with high humidity and is not afraid of water ingress. Fresh stains can be cleaned with a damp sponge or cloth. The use of detergents is prohibited. |
| Washable . It is allowed to clean the canvas with a wet sponge or rag with the addition of gentle detergents (liquid soap, gel). |
| Super washable . Designation of wet cleaning using any cleaning agents other than abrasive ones (some powders, pastes, suspensions). |
| Dry cleaning . Dry brushing |
| Wear-resistant . The designation of a brush with a wave indicates that the canvas is cleaned with a damp sponge or brush. |
| Friction resistance . Cleaning with a brush or sponge with the addition of detergents is allowed |
Designations on wallpaper - light fastness
The sun symbol indicates the lightfastness of the wallpaper. Each icon corresponds to the degree of fading of the coating due to regular exposure to sunlight.
| Moderate light fastness . Wallpaper quickly loses color. Suitable for shaded areas. |
| Relative light fastness . Partially resistant to sunlight. Not recommended for rooms with windows facing the sunny side. |
| Light-resistant wallpaper . Designation of wall coverings for rooms on the sunny side. |
| Very light fast . The coating tends to retain color for a long time |
| Maximum light resistance . The coating lasts without fading. |
Designations on the wallpaper - joining the pattern
Markings with arrows indicate the method of combining the canvases. The designations indicate both an arbitrary sticker and precise joining of the elements of the design.
| No docking. The canvases are glued randomly; pattern matching is not required. |
| Docking on the same level . The pattern is adjusted to the same level as the adjacent piece (on the packaging the designation may be repeat 64/0, for example). |
| Step combination. On the new roll the design should be half higher than on the glued one. |
| Counter sticker . Two arrows in the opposite direction mean that each new piece is glued with a 180° turn. |
| Direct gluing . Sometimes there is a designation in the form of a straight arrow. It says that the canvas is glued strictly in a given direction. |
| Exact offset . The numerator is the height (step) of the pattern, the denominator is the amount of displacement of the canvases. |
Marking on wallpaper - applying glue
The brush icons will tell you how to glue wallpaper. By the designation you can understand where to apply the adhesive (on the canvas or the surface to be pasted).
| Applying glue to the wall . The adhesive composition is applied only to the surface to be glued. |
| Applying glue to wallpaper . Only canvases can be applied with glue. |
| Wallpaper is self-adhesive after wetting . The canvases are by default, before pasting it is enough to moisten them with a damp cloth or sponge. |
| Special glue . For pasting, a special adhesive is required. |
Wallpapering (installation)
Methods of applying glue and joining the pattern have their own symbols. But there is a sign indicating a special gluing technology.
Invisible docking. The sheets are glued with an overlap of 4-6 cm; after pasting is completed, it is carefully cut off.
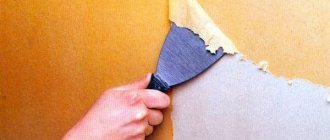
Removing wallpaper (dismantling)
The markings will show how easily the wallpaper can be removed from the walls. Understanding icons will come in handy when it comes time to update your interior.
| Completely removable. The coating is easily removed without the use of equipment. |
| Partially removed. They are removed in layers using a scraper and sometimes water. New material can be glued to the very bottom layer. |
| Removed after wetting. They are removed after preliminary application of liquid to the canvas. |
Other designations on wallpaper
Manufacturers have provided the market with anti-vandal, fire-resistant and other wall coverings. Special icons will help you decipher unfamiliar symbols.
| Wallpaper with top embossing . The canvas has several layers. |
| Fire resistant. Treated with a special compound that is difficult to ignite. |
| Shock resistant. Anti-vandal wallpaper made of very durable material that is resistant to external mechanical influences. |
| For painting. The roller designation indicates that the material can be repeatedly painted with any dispersion paint. |
In addition, wallpaper produced in EU countries may have special markings, for example, Gütegemeinschaft Tapete eV. This organization has developed special regulations for the quality and testing of wallpaper, which indicate technical requirements, as well as standards regarding harmlessness to health and the environment . The European Union has a special, independent supervisory body that monitors compliance with such regulations.
Wallpaper quality mark
Another marking that meets the requirements of EU directives is the CE mark, which is used for the entire range of construction and finishing products. The CE mark placed on the wallpaper label means that the manufacturer guarantees that the quality of this product complies with the currently valid EU directives regarding the quality of construction products.
EU legislation is very strict in matters of this kind, so the presence of such designations on the label is an additional plus in favor of a particular product.
CE mark for construction products
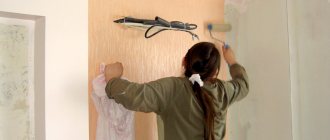
Gluing non-woven wallpaper
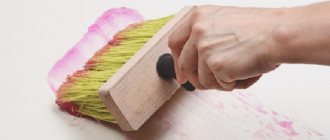
Apply glue to the wall with a roller, slightly wider than the marked vertical line. You shouldn’t skimp on the glue - the canvas should slide, but try not to leave any drips, roll out the glue evenly.
In places where there are strong drips, folds will certainly form. The exception is corners. There should be a lot of glue here so that it does not dry out before gluing the adjacent panel.
Lubricate it especially carefully. We begin to roll out the first sheet from top to bottom, while trying to ensure that the edge of the sheet coincides with the marked line, leaving a margin of about 5 cm in case the ceiling or ceiling plinth deviates from the horizontal.
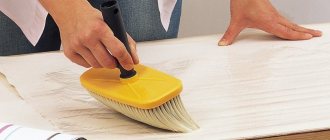
When rolling out, try not to tear the roll off the wall, as folds may occur. We work with a brush quickly, sweepingly, smoothing the panel from the middle to the edges.
If wrinkles do appear on the wallpaper, remove them with a brush; do not roll out the roll further until all the wrinkles are removed. We rolled it out, now we’ll cut off the interfering part at the bottom.
You need to cut carefully, the plinth covers only 3 - 4 cm. If you find a missing wrinkle, you can smooth it out with a plastic spatula (attention - out of habit, the spatula tends to tear off the embossing of the top layer).
Using the rounded side of the spatula, squeeze out the glue from under the edge of the wallpaper, to which the next sheet will be joined. Now you need to carefully cut off the part that is bent at the ceiling.
Let's use our finger to find the angle where the two walls and the ceiling meet. At this point we make a cut at an angle. Having folded the panel, pierce it with the tip of a knife and cut it. The knife should be pointed towards you.
Having cut it, we press it back into the corner. We take a narrow metal spatula, and with the corner of the spatula (pressing forcefully) we drag it along the wallpaper in the corner between the wall and the ceiling.
Cut off the excess strip with a knife, pressing the spatula into the corner with the working side. At the same time, we do not remove the knife from the cutting line; we only move the spatula.
This helps keep the cutting line straight. In the same way we glue and trim the wallpaper adjacent to the corner. The only difference is that in the corner we press down both canvases, each on its own side, and cut two at once under the spatula.
We take out one of the cut strips from under the canvas, coat the corner with glue if it has had time to dry. We wash off traces of glue on the ceiling or baseboard with a damp sponge.
Also wash the corner seam, trying to remove all traces of glue. We roll out the next panel along the wall, combining the pre-designed parts of the pattern, without trying to immediately roll out the panel close to the previous one, but leaving a gap of 1 mm.
We repeat cutting to the ceiling, leaving the seam untouched. If the walls are quite crooked, the joint may overlap. In this case, it is better to tear it off and re-glue it, making the seam larger (it is easier to pull the seam together than to remove the joint).
You will have to use a metal ruler and a knife to cut through two sheets, but you won’t be able to cut straight without experience.
You'll have to repeat it again, and so on until the canvas runs out =). It’s better to leave a small seam than an overlap, it will be less noticeable!
Pulling the fabric over the seam
Starting from the middle, pull the fabric with a plastic spatula towards the seam. The wider it is, the farther from the seam you need to start. If the seam turns out to be too large at once, you need to try to tighten the panel before cutting it to the ceiling.
If enough glue is applied, everything will work out. You need to pull until you get a perfect joint, trying to avoid overlap - it’s difficult to remove. The canvas is glued, the seam is pulled, we wash off traces of glue from the joint. Change the water often.
Watch the video: Wallpapering the wall
Letter designation on wallpaper
Not all manufacturers write what is included in the composition and what the properties of the coating are. But the presence of letter designations is always present. The abbreviations are explained below:
| A | Acrylic. Breathable material, suitable for residential areas. |
| B | Paper. Paper-based covering mainly for living rooms. |
| BB | Foamed vinyl. A coating with a pronounced relief masks defects and visually enlarges the room. |
| PV | Flat vinyl. Vinyl wallpaper with flat pattern. |
| RV | Embossed vinyl. Non-woven base with embossed design. |
| TKS | Textile wallpaper. Non-woven or paper wallpaper with textile overlay. |
| STL | Glass wallpaper. Durable fireproof material, resistant to mechanical stress. |
| STR | Structural for painting. Dense material, usually white. Subject to repeated painting. |
| A+ | Ceiling covering. Special material for gluing ceilings, not for walls |
The meaning of the numbers on the roll
Symbols on the label in the form of numbers also provide useful information.
| vendor code | Wallpaper design code number. |
| Batch number | Contains information about the number of the production line and shift, and color features. When purchasing, it is recommended to choose rolls with the same batch number, otherwise you can purchase canvases with a slight difference in tone. |
| Size | The width of the web and the length of the roll are indicated. |
Important! On each roll of wallpaper, on the packaging label there is a release date and a batch number, sometimes also called a batch number. The batch number is important for the buyer, since wallpaper from different batches may have significant color differences. Therefore, we must strive to buy rolls from the same batch. If this is not possible, rolls from different batches should be distributed on opposite walls, in which case the difference in color will be least noticeable.
Preparatory stage
First you need to clean the walls of old wallpaper and make sure there are no cracks or gouges. It is advisable to treat the wall with a deep penetration primer or a liquid adhesive solution that will be used for gluing.
It must be pasted on a dry and flat surface, there should be no draft in the room, the windows should be closed and the air conditioners should be turned off.
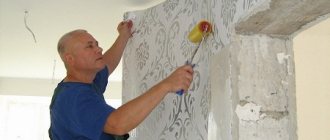
We will assume that you have already calculated the required amount of material, the walls of the room are prepared, the sockets and switches are removed, all that remains is to apply the final touch, as they say - stick it on. Pasting walls with non-woven wallpaper is a rather interesting process.
- plumb line (you can use a building level);
- tape measure - 3 - 5 m;
- roller with long pile;
- brush (for smoothing);
- plastic spatula with a soft edge (for rolling);
- sharp knife;
- bucket or basin;
- mesh for removing excess glue from the roller;
- narrow metal spatula;
- a bucket for clean water;
- foam sponge;
- pencil.
It is believed that you need to start the sticker from the window into the room. This is correct, but only for wallpaper that is glued overlapping, forming unsightly seams.
Non-woven wallpaper is glued end-to-end, and the quality of its edges allows it to be glued without a noticeable seam, so it will be more convenient to start pasting from the corner, gluing the panels on the walls one after the other.
Marking the wall
We mark 1 m from the corner on both walls. Non-woven wallpaper has a width of 1.06 m, but a small overlap is useful for creating the correct joint in the corner.
Using a plumb line or building level, mark a vertical line at the 1 m mark. You don’t have to draw along the entire length; we’ll limit ourselves to marks every 40 cm. We carry out this operation on each wall.
So, the walls have been marked, now we need to prepare the wallpaper. We will prepare for the entire room at once. There is a nuance here: they can be either with or without adjusting the pattern.
You can find out the size of the fit by looking at the pictogram on the label. Let's say that the repeat (fitting size) is 64 cm, this means that the pattern will be repeated on the roll every 64 cm.
Let’s take the height of the room to be 2.85 m. It is necessary to cut the wallpaper so that when combining the panels, you don’t have to add pieces of wallpaper on top or bottom. A simple height margin of 10 - 15 cm, recommended by most textbooks and repair experts, is not suitable for this condition, especially with high ceilings.
Exit - the length of each canvas must be a multiple of 64 cm, and it must be greater than the height of the room. If the height of the walls is 2.85 m, the size of the canvases will be 3.20 m. We spread the polyethylene on the floor and roll out the roll face down on the film. Having measured 3.20 m, we make a notch with a knife.
We bend the non-woven wallpaper along the notch so that the edge of the bent part coincides with the edge of the main canvas, we get a fold at an angle of 90 degrees. We roll out the next sheet from the roll on the same side as the previous one. By bending the edges of the lying and re-rolled canvas, we check the fit.
For this, some noticeable part of the drawing is needed. We combine identical parts of different panels. After checking, we cut off a new panel. We cut canvases for the whole room.
When starting a new roll, do not forget to repeat the fit check procedure. Having cut the required number of panels, roll them into rolls face inward, roll them on the same side - from the bottom.
Roll carefully, without distortions. The non-woven wallpaper is ready, all you have to do is dilute the glue and you can start gluing the non-woven wallpaper. How to dilute the glue is basically written on the packaging.
One piece of advice - dilute it with cold water; warm water will form more lumps. Vigorously stirring the water with any clean stick until a funnel forms, evenly pour the glue in a thin stream. Having fallen asleep, wait a couple of minutes and mix again. We remove the formed lumps.