Paint for pine furniture
Pine furniture is very popular due to its pleasant texture, noble color and affordable price, but this species is quite soft. Such wood practically does not dry out, for example, compared to aspen. It is a universal material for the production of chairs, chests of drawers, tables, decoration and construction of houses, unlike cherry, spruce and other species. Let's take a closer look at how to paint pine furniture. After all, many people buy items made from such material unpainted in order to apply the coating themselves (in order to save money or to create a unified interior).
Types of paint for pine furniture
To give the desired color and performance properties to pine furniture, several compositions are used. This is due to the fact that wood requires certain processing due to its characteristics. However, the compositions listed below are used not only for this type of wood, but also for others. Remember that it is always worth checking whether the previous coating will be compatible with the new one. So, let’s look in order at what and why should be used when painting pine furniture.
Tinting. It is used for:
- to hide surface defects or heterogeneity by painting in a darker shade;
- highlight the wood structure and improve its natural color;
- give pine furniture the appearance of a valuable type of wood;
- get a color unusual for wood (red, blue, etc.).
Varnish or paint. Their purpose is:
- to hide surface defects;
- give the wood the desired color;
- hide the structure and texture of wood (paint) or, conversely, emphasize (varnish).
Let's consider what types of compositions are divided into.
Water-soluble paints and varnishes . Their main advantages include:
- dry quickly;
- as a rule, they do not emit harmful fumes (therefore they can be used for painting furniture for children);
- resistant to moisture;
- easy to tinting;
- After drying, the paint layer becomes frost-resistant.
It is important to know that varnishes and paints themselves should be stored in a warm room, since at low temperatures the compositions can deteriorate. As a result of painting furniture made of pine or other wood, you will get a covering coating (paint) or a transparent coating (varnish).
On organic solvents (varnishes and enamels) . They have a number of features:
- resistant to moisture;
- takes a long time to dry;
- sold at affordable prices;
- during operation they may emit a strong, unpleasant odor.
If furniture made of pine or other wood is painted with enamel, the surface will be opaque, if varnished, then transparent.
All varnishes have fairly high vapor permeability, and also leave wood (not just pine) the ability to “breathe”, namely to give and receive moisture from the environment. Such compositions are excellent for new or well-preserved furniture. Varnishes contain substances that protect wooden furniture from destruction and fading. Please note: when you need to repeat the treatment, the previously applied coating does not need to be removed (unlike paint). A fresh layer can be applied to the old one.
Painting process
It takes very little time and expense to remodel an old wooden crib. All work consists of the following stages:
- First of all, disassemble the crib into its component parts;
- old paint, if any, must be removed and the wooden surfaces polished with fine-grain sandpaper, trying to make them as smooth as possible;
- sand large parts using a special round attachment on a drill with emery pads;
- remove dust from treated surfaces in order to apply paint and varnish materials in an even, clean layer;
- Wash small parts and grilles thoroughly with soapy water and dry well;
- sanded elements should be coated with a water-based stain that has the same tone as the gratings;
- assemble the furniture, firmly connecting all the parts;
- Apply clear acrylic varnish or paint to all elements, including grilles. The choice of varnish should be given special attention. It must be safe for children's toys and not contain harmful substances. It is good to use one that is water-based, odorless, dries very quickly and is absolutely harmless to the child’s health. Paint or varnish must be applied in 2 layers;
- at the next stage, use a rag or sandpaper to walk along the edges of the product where drops of paint could have accumulated;
- After painting, the baby crib should not be left in the fresh air (on the street or on the balcony) until the paintwork has completely dried. Otherwise, small debris or insects may stick.
How is detarring carried out?
A special feature of pine is the presence of a large amount of resinous substances, which does not always allow paint or varnish to lie flat, so the wood must be deresined before applying the coating. Also, when a large amount of resin accumulates in a certain area, it darkens and spoils the appearance of the furniture. In addition, a sticky film appears that will prevent the primer from absorbing. This procedure involves the complete or partial removal of resinous substances. To do this, use a special solvent-based composition. It is applied with a brush, then the surface is washed and dried. If the tarred areas have a large area, then they are cut out with a knife and sealed with putty. The solvent may contain components such as:
- technical solution of acetone;
- baking soda;
- technical alcohol;
- potash;
- hot water;
- soap flakes.
How to tint pine products
After high-quality tinting, furniture made of any wood usually acquires a smooth surface with a low gloss. Upon completion of the procedure, the products should dry well. Then the surface is usually coated with varnish or transparent paint. Before tinting, make sure that the following recommendations are followed.
- The surface to be treated must be well sanded.
- Before tinting, the pine is treated with a primer.
- The surface of the products should not contain dark spots or streaks of dye.
For processing, compositions are used that have light-resistant properties, are also well absorbed and easily soluble in water. The tint itself must be applied with a brush. Pay attention to what recommendations (number of layers, drying time, etc.) the manufacturer gives.
How to paint or varnish pine furniture
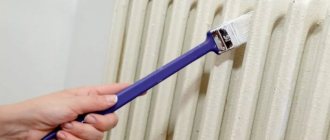
You have already chosen how to paint your pine wood furniture. Now it’s worth finding out how to do it correctly. It is better to apply the paint in several layers as it dries. Before applying the next layer, the previous one can be sanded with fine-grained sandpaper. The general procedure for painting or varnishing is as follows:
- removal of old coating, knots and other defects . A mechanical cleaning method is suitable for this. You can use brushes or sanders, as well as sand, shot, etc. If the furniture already has a varnish coating, then evaluate how durable it is. The flimsy coating must be completely removed, and the strong coating must be rinsed with warm water and dried;
- detarring . Details of the procedure can be read in the block above;
- tinting . Information on this issue is also indicated in a separate block;
- sealing cracks and chips with putty . It must be applied in a thin layer. First local, then continuous. There should be no more than three layers. And each of them should be well dried;
- applying primer . It is applied with a brush, spray gun or other tool. If you are planning a glossy surface, then the already dried primer must be treated with emery cloth. On furniture that will be used in high humidity conditions, the primer is applied with a brush. The layer should be thin in any case (compared to the outer layers of paint);
- painting with a brush, roller or airbrush . A roller can cover a large area, but it does not allow you to work with quick-drying varnishes. For these compositions it is recommended to use a brush. It is convenient to paint furniture with an airbrush, but in this case the consumption of materials may be slightly greater than when using other tools.
Features of painting a crib
How to paint a baby crib? Painting children's furniture is becoming especially popular at the present stage, because many parents do it themselves, and varnish is not suitable here. And even when purchasing store-bought options, sometimes there is a need to change the color of the product. This is most relevant for a crib.
The following steps should be followed:
1. The crib must be completely cleaned of the original material: paint, varnish, oil. This is done using sandpaper or a wood sander. The abrasive must be of high quality and complete down to the wood itself. Wood dust is wiped off with a rag or a hard brush. This point also concerns the question of how to repaint the product.
Processing the product with sandpaper
2. How to paint a wooden bed first? Some modern paints and varnishes can be applied to an untreated surface, that is, simply repainted. If the painting is done unevenly, that is, with additional painting, then after sanding a primer should be applied, and in some places even puttying. Varnish is sometimes applied on top. But it is better to avoid varnishing.
3. To paint the parts of the crib, most often a roller, a brush and a washcloth are used simultaneously. Large and voluminous surfaces are processed using a roller. Rods and thin furniture elements are painted with a brush. It is better to paint hard-to-reach parts with a washcloth, soaking the parts.
4. How to paint a bed? During the painting process, a small amount of paint is applied to the item being treated. If drops appear on the elements of the crib, they should be wiped off periodically. Such decor can only spoil the aesthetic appearance of the furniture. If drops do occur, they can be removed using sandpaper.
The following instructions will be auxiliary advice, which define the features of the procedure and the coating medium itself:
- Processing of the paint and coloring agent is carried out at least a week before direct use.
- If bubbles appear on the surface during the application of a layer of substance, it is better to remove the paint with a solvent and cover the area again.
- If you are priming or filling the surface of the crib, you need to let the unpleasant odor dissipate.
Painting a baby crib with your own hands is very simple. If you put in a little effort and carry out each stage carefully and carefully, the final result will exceed all expectations. The aesthetic feature of this finish is a quick but effective way to transform the appearance of children's furniture. The repainted surface will be of no less quality for further use.
Restoration of a crib (1 video)
Source: gidpokraske.ru
TEX products
TEX materials are suitable for all types of wood. We suggest purchasing the following formulations.
Enamel for wood and metal “Profi” . Great for interior and exterior painting, painting furniture, houses and so on. Dust drying time is approximately 6–8 hours. The coating will be durable (up to 8 years). The composition itself has virtually no odor during operation.
Heavy-duty parquet ECO-VARNISH BIOTEKS. The material is water-borne and wear-resistant. It has an acrylic base. The furniture product can be fully used 12 hours after painting. If you follow the manufacturer's recommendations, consumption will be economical.
The choice of coating for pine and its application should be treated very carefully, since this furniture is sensitive to mechanical stress and other environmental factors. However, with high-quality processing, furniture made from this wood can last for many years. If you have questions on this topic, you can contact our specialist. He will help you choose the best option and also explain the nuances of the work.
We paint old furniture white or give life to unnecessary things
Often an old chest of drawers, chair, table or cabinet made of solid wood is very dear to us, like a memory. It’s a shame to throw them away, and they no longer fit into the new interior. Therefore, the task is to update it. How to paint furniture at home?
I suggest the most elegant, fresh color is white. Painting furniture is a great way to extend the life of old furnishings and equipment and give them new life.
For example, white distressed furniture can be finished in such a way that it looks very stylish. You will need to process the furniture in two stages:
- whitening;
- light sanding with sandpaper.
Wooden products made from solid wood are best suited for this purpose: oak, pine, birch, beech.
To work you should prepare:
- dark dye and white acrylic paint or two colors of acrylic paints;
- white wax candles;
- brushes;
- coarse and fine-grained sandpaper;
- textile;
- knife.
- Clean the surface of the chest of drawers or chair from dust, wipe it several times with a damp cloth and leave until completely dry.
- If the surface is painted, you need to remove the varnish layer with sandpaper (first coarse and then fine-grained).
- Places that you want to highlight: carved decorations, slats, edges, should be covered with darker paint (brown and blue shades are ideal here). Leave the paint to dry.
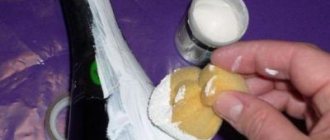
- To get an uneven and natural effect of worn corners, wax the areas previously painted with dark paint. The wax will make it so that the next coat of paint will not adhere tightly to these areas.
- Cover the entire surface with white paint, preferably several times, with breaks to dry. Avoid stains.
6. Areas covered with an additional layer of paint and wax should be rubbed with a knife. Don't press too hard - this way you will get a good effect.
7. Rub the entire surface with fine sandpaper to level the surface.
Whitening with whitening paste
Bleaching using a bleaching paste consists of rubbing the wood with a special paste containing wax and pigment. The wood surface will develop distinctive white lines, making it look older. Porous wood is suitable for such bleaching - trees such as oak and ash.
You need to buy in the store:
- special paste,
- prepare paint in the chosen color,
- metal brush,
- hard brush,
- textile,
- a piece of coarse and fine-grained sandpaper.
- Wipe the clean surface of a chair or chest of drawers from dust several times with a damp cloth and leave until dry.
- If the surface is painted, you need to remove the varnish layer with sandpaper.
- Paint the surface with paint and let it dry.
- Using a wire brush on the wood, make tiny grooves according to the grain orientation.
- Apply the whitening paste, fill the grooves well and wait for the paste to dry.
- Wipe the surface with a dry cloth.
- Cover the surface with varnish.
Express whitening
If you want to give a simple wooden stool new life, you can do it with a washed-off white paint effect. Nothing could be simpler.
- Rub the wooden surface with sandpaper.
- Using a brush, apply a coat of paint.
- When the paint dries, remove excess paint with a napkin.
- Coat the wood with varnish.
How to repaint lacquered furniture? Yes, just like repainting polished furniture and any other furniture. The only problem is old, cracked varnish or polish. It can be removed in several ways:
- The mechanical method is the cheapest and most accessible , but also the longest and most labor-intensive. Old polishing or varnishing is removed using sandpaper or a sandpaper. Once you select it, don’t forget to wear safety glasses to prevent dust and small pieces from getting into your eyes.
- The chemical method is quite expensive ; it involves special chemicals applied to the old surface and then washed off with water. They come in the form of powder, gel, foam, etc. When removing old varnish using this method, you need to protect the skin and mucous membranes.
- The thermal method removes the old coating using a hair dryer . Heating the surface with one hand, scrape off the polish or varnish with the other. With this method, you need to be careful with temperatures to avoid ignition.
Painting a baby crib at home
To paint a baby crib with your own hands you will need:
Important! During the painting process, you should make sure that the paint is applied in a thick layer and does not run into one place. To do this, you should not put a large amount of paint on the working tool.
Instructions for painting a bed with your own hands:
- We remove the mattress from the crib and all other things that were on it.
- We take the children's furniture item into a well-ventilated area.
- If there is an old layer of paint, it must be removed. To perform this action you will need a spatula, an angle grinder with a metal brush attachment and a hair dryer.
- Using fine-grained sandpaper, you need to sand the entire surface that you plan to paint. For large areas, you should use a drill with a special attachment for polishing surfaces.
- Remove dust from the cleaned crib.
- Wash small parts that do not require painting in soapy water and soap. Let's dry it.
- We treat all surfaces with stain.
- We are waiting for the crib to dry completely.
- Let's put it together into a single whole.
- Apply paint to all surfaces. This action must be carried out in two stages.
- In the place where drops of paint have accumulated, carefully clean it with sandpaper or a cloth.
- We take the bed outside or onto the balcony and leave it to dry completely.
Important! When deciding how to paint a wooden bed, after removing the old coating layer, you can apply a special primer. This product will get rid of cracks, chips, scratches and other irregularities.
What is the best paint to use for children's furniture?
Author: Anastasia Isakova · Published 05/07/2017 · Updated 05/07/2017
Paint for children's furniture is currently available in a huge range. Bright colors, which will undoubtedly please both the child and the parents, can harm the baby’s health. Even the use of white dye does not guarantee safety. Especially if such a finishing material is used to paint pieces of furniture that are often in contact with the child for a long time, for example, a bed, a high chair, a desk.
To avoid adverse effects, you need to choose your paint carefully. To do this, you need to know what criteria it must meet; it is especially important what paint to paint the crib with.
Choosing paint for repainting furniture
The material of the furniture affects the choice of paint.
Acrylic paint is popular for painting wooden furniture. Among its advantages:
- increased stability due to good absorption;
- quick-drying;
- economical, as it is diluted with water;
- the smell is not aggressive;
- can be used without priming;
- antiseptic properties,
- non-flammability.
Minus: only white color, which can be tinted with color.
The spray in a can speeds up the painting process, applies evenly, and dries quickly.
For a glossy surface on wood, choose enamel varnish paint.
To prevent the surface from shining, use an oil matte finish.
To preserve the natural structure of the wood, a colorless product is purchased, which is available in shades.
Water-based paint is used more often in the bedroom and children's room. It does not smell, dries in a matter of time, and is affordable. The downside is that it does not tolerate moisture.
The surface painted with latex composition can be washed. The paint is not afraid of water and sunlight, but is expensive.
Expensive paints also include silicone paints with the addition of acrylic. The paint penetrates the wooden surface and is not afraid of moisture.
Criterias of choice
Before covering the surface, preliminary finishing work must be carried out correctly. Violation of one of the technologies of this kind can cause problems with further processing. In addition, low-quality finishing materials can cause negative effects on the baby’s health.
Initially, the characteristics of dyes are studied. In turn, they must meet the following criteria. In particular, this applies to paint, so that everything is safe:
- The composition of finishing materials should not contain substances that cause allergic reactions. It is better to avoid those products that contain unknown compounds and contents. They have special coding.
- The paint must not contain heavy metals or pesticides. It often happens that children put everything that surrounds them into their mouths, so paint particles enter the body. When interacting with organic substances in the body, they oxidize and release harmful particles, destroying furniture fibers.
- The basic components of children's paint do not contain chemical compounds. The most suitable solvent for the substance is water. During the drying process, water does not release volatile harmful substances into the air throughout the entire time. Some impurities have an adverse effect on the body.
- The harmless composition eliminates the presence of flammable substances. This will ensure safe operation in extreme conditions. As a result of combustion, no harmful components and compounds will be released into the air.
- The paint must be elastic, well pliable for periodic wet cleaning and chemical influences. Constant contamination from food, paint, feces and the need for cleanliness can significantly wear down the coating, leading to mechanical damage.
The choice should be made not only in accordance with the words of the seller or consultant, you need to check the quality certificates. If the paint and finishing materials are legal and completely safe, then the document will definitely be present in the store. The option of how to paint the furniture will immediately be determined. It is best to paint it white - it is as versatile as possible.
On video: paints for a children's room.
Reasons for painting a bed white and necessary tools
Any furniture owner can paint a bed white. Such measures are resorted to in cases where the product for some reason has lost its attractive appearance, has faded, or has scratches and abrasions. Sometimes owners want to change the appearance of a model without spending money on purchasing new products. Preparation for work is the first stage, the quality of which determines the success of the procedure.
For painting, you must choose a dry, ventilated area free of small insects. First of all, the old coating is removed, after which a new layer can be applied. To complete the work you will need the following tools:
- A product for cleaning product elements and degreasing.
- A brush made of soft material for removing dust.
- Primer and putty, with which the bed is prepared for painting.
- Screwdrivers and rubber spatula.
- Tools for applying paint and mixing it.
- Mixtures for applying a new acrylic type coating.
If you have all the tools and a sufficient supply of paint, the technological process is carried out in stages. At the end, you can get a coating that is not inferior in quality to the factory one.
Types of paints and varnishes
How to paint a baby crib? Paint and varnish materials that are suitable for use in a children's room are divided into several main types. Paint for children's furniture is as follows:
- Water-based acrylic paint. This type has many advantages. This paint is easy to apply to the surface. It has high wear resistance, resistance to moisture, and does not emit harmful substances during operation. Acrylic paint for a baby crib has a huge range of colors and all shades. The negative feature is the high cost.
- Acrylate paints are considered harmless, but less practical. The consistency is elastic and easy to apply during the painting process. But first, the surface must be carefully treated, since any puncture or unevenness can cause damage or cracking of the coating. Does not tolerate wet cleaning well.
- Water-based paint will be a wonderful analogue of acrylic and acrylate. It combines their positive characteristics, but at the same time has its drawbacks - it is quickly erased from the surface as a result of wet cleaning and mechanical stress.
- Oil-wax is an original coating for furniture, which often replaces varnish. A completely environmentally friendly substance that has high wearability and processing quality. The oil penetrates into the depths of the wood, and the wax creates a protective layer on the surface. The negative features are that the paint and varnish substance is not very widespread and is expensive.
- Nitro paints can completely replace all of the above options. Durable, bright, environmentally friendly, non-flammable and elastic. At the same time, the price of one can of paint is quite high.
What paint can be used to paint a baby crib? There are other analogues of similar dyes, which are not yet widely used in our region. These are unique developments that have many advantages.
Additional recommendations
It is not necessary to paint the crib with only one type of paint material. You can show your imagination and paint only individual elements, and apply varnish to the rest of the surface, because wood itself is a beautiful material. You can buy small jars of azure in different colors and make the furniture multi-colored; this will help your baby learn to distinguish colors.
By creating a new bed design for a child, you can simultaneously increase the ventilation of the mattress due to the bottom of the crib. This is done by cutting a hole in the bottom of the product, which consists of fiberboard or a solid sheet of plywood.
Source: babypalace.ru
Materials and preparation
Stage 1
Buy gloves and a face covering and prepare the area where the furniture will be painted. Cover the floor with old thick cloth to avoid staining it with paint, and also make sure the room is well ventilated.
Stage 2
Before you start painting, remove the furniture from handles and any unnecessary hardware. This way you will carefully treat all hard-to-reach places and possible cracks, eliminating unpleasant surprises if you want to change the lock, handles or any other accessory.
Stage 3
You can even out wood fibers and fill cracks and holes using wood filler. The consistency should be quite thick, but the coating to be treated must be properly prepared. Treat the damage with sandpaper to remove any remaining protective varnish, then remove any remaining dust. Using a putty knife, fill the cracks with wood filler, then remove the excess mixture, thoroughly smoothing the surface, and leave it to dry completely.
Stage 4
Use a soft, clean cloth to remove marks from the furniture surface. If necessary, use a special detergent and wipe the wood surface with a dry cloth.
Primer and painting
1. To make the paint go on easily and last as long as possible, use a primer. Gently brush an even coat of primer onto the surface of the wood. Carefully paint corners and hard-to-reach places. For a smoother surface, use a roller. Allow the primer to dry before painting the furniture.
2. The original effect of a sandy surface can be achieved using fine sandpaper. After priming, this technique contributes to a more thorough painting of the wooden surface, but first it is necessary to properly clean it of dust and primer residues.
3. After finishing the furniture with a roller, touch up the edges and corners with a brush. It is worth noting here that quick-drying paints tend to be applied unevenly. The result is sloppy strokes and blotchy areas. A special conditioner will greatly facilitate the work: Floetrol - for latex paints and Penetrol - for oil paints, which will prevent them from drying out quickly.
4. Use only high quality brushes. In low-quality brushes, fallen fibers remain painted over on the surface. A good brush, although more expensive, will last for years with proper care.
Stages of painting a bed white
You can find out how to paint a bed white on numerous resources. The procedure is not complicated as long as the steps are followed sequentially. The standard process is broken down into the following steps:
- Using detergent, the surface of the bed is cleaned of dirt, stains and foreign objects. After this, the product is dried and disassembled into individual elements.
- To remove old paint, the surface is treated with sandpaper. In addition to cleaning the product, small cracks and defects are removed.
- Priming of prepared elements and subsequent filling of deep cracks. The application of primer takes place in two stages.
- Using a soft cloth, clean the product from dust and debris.
- Using masking tape, cover the elements that cannot be painted.
- A layer of paint is applied in two, or preferably three layers. After each pass the model is dried.
- At the final stage, the surface is coated with glossy or matte varnish. As a result, the design receives additional wear protection and an attractive appearance.
Final stage
1. After priming and applying the first layer of paint, specialists, as a rule, paint the surface again, but only after it has completely dried (at least after 6 hours).
2. Seal the paint using varnish or sealant. This will not only protect it from scratches, but will also give an aesthetic appearance and a slight shine to the wooden surface.
Make sure the sealant is completely dry before moving the furniture back into place.
